Changes

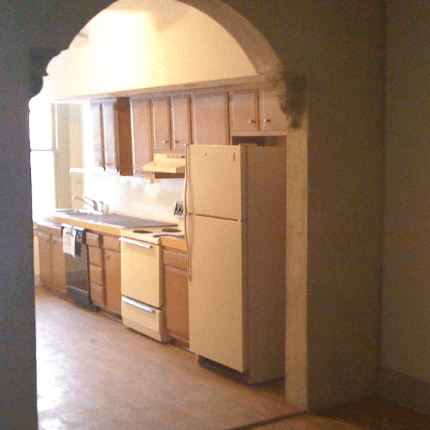
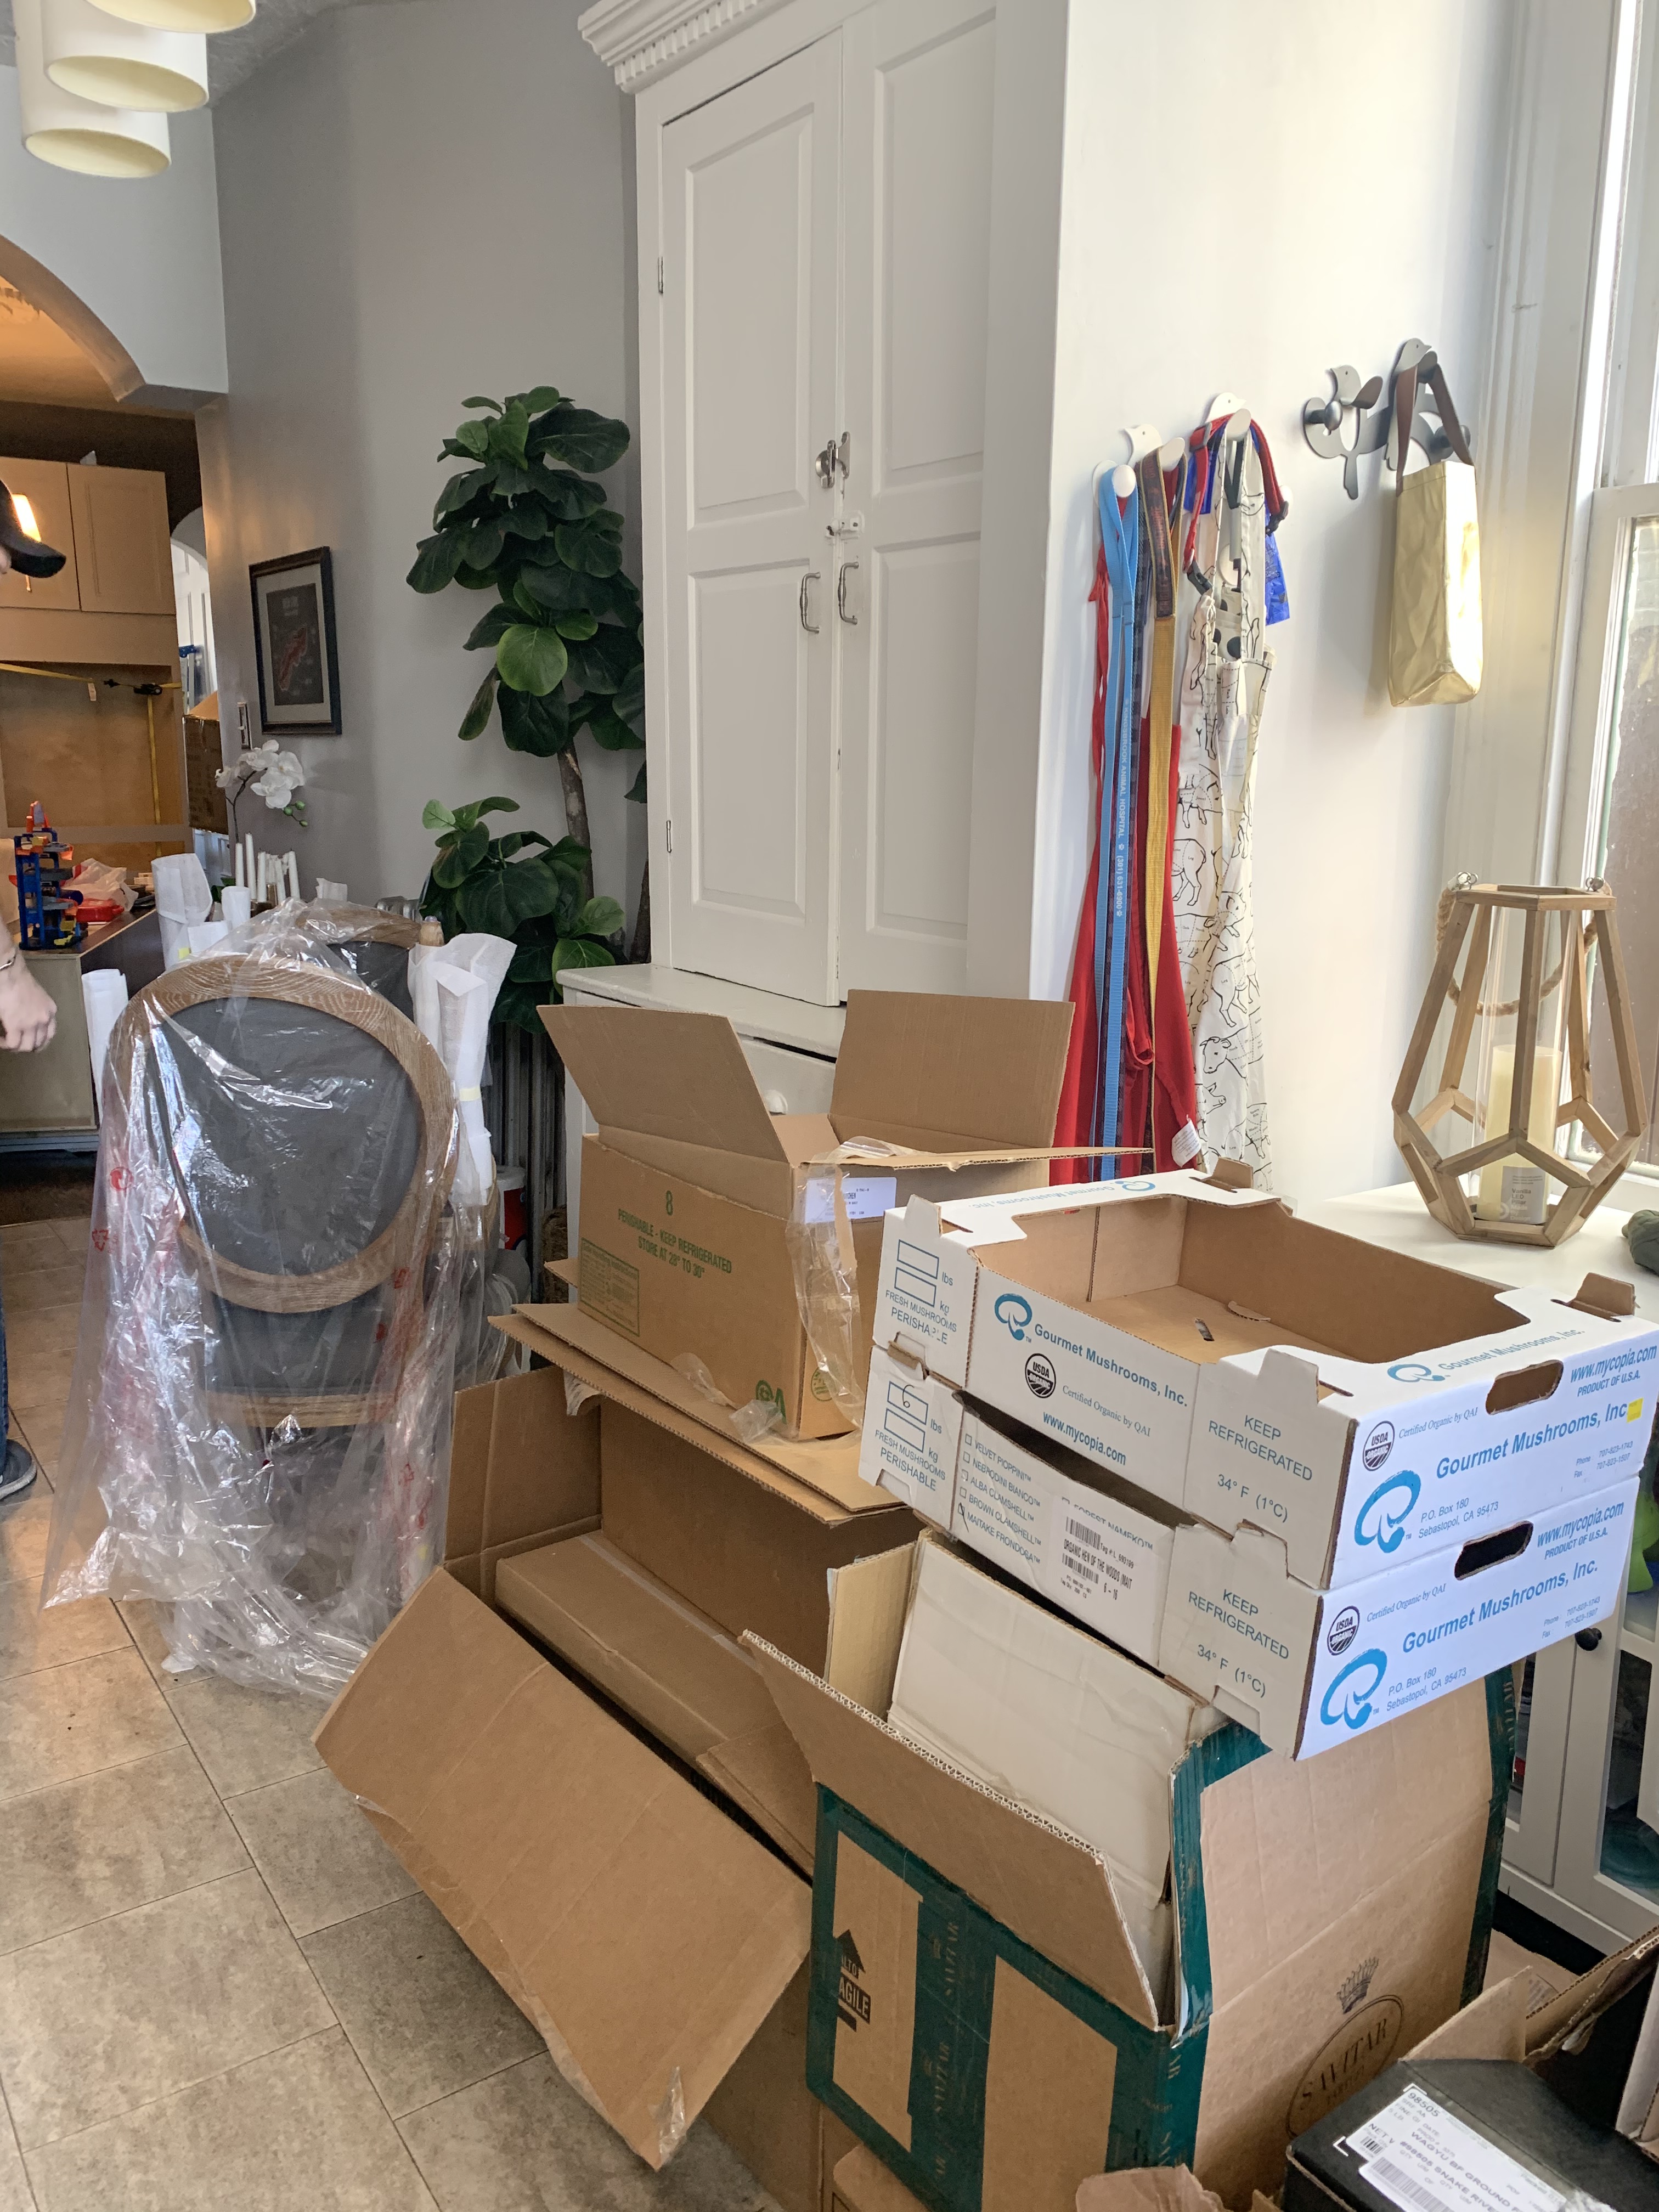
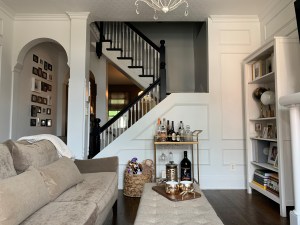
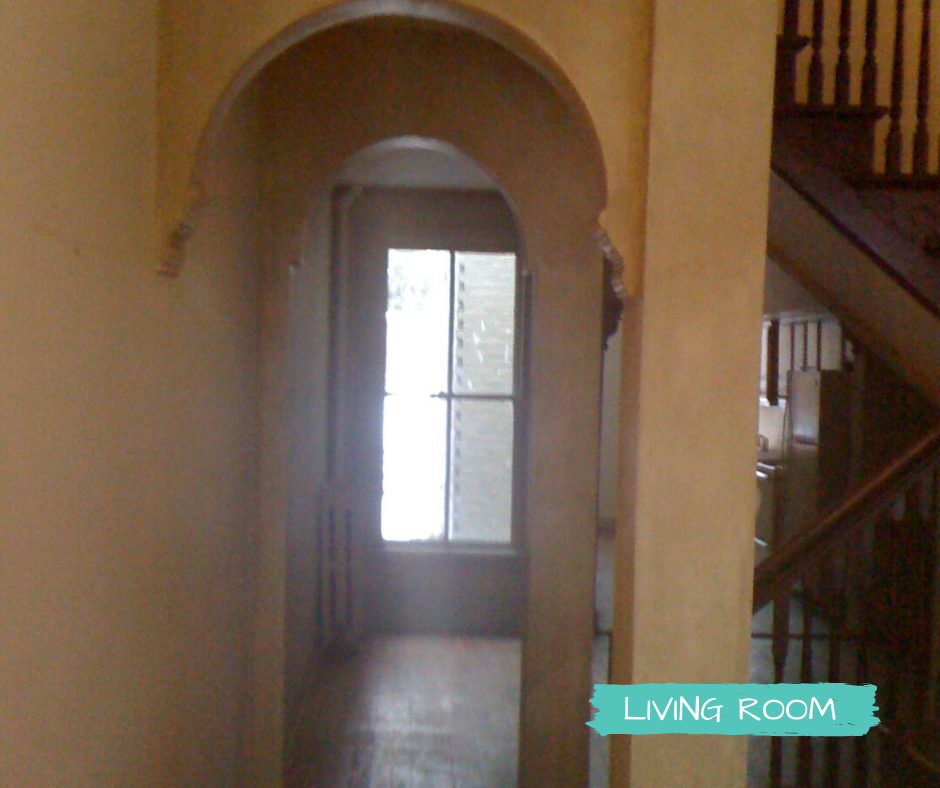
This post is all about the changes happening in our little nest. We are still a few weeks away from the completion of this kitchen renovation, but I’m excited to share some pictures of the progress so far. I’m even more excited that these cabinets are now out of my living room!

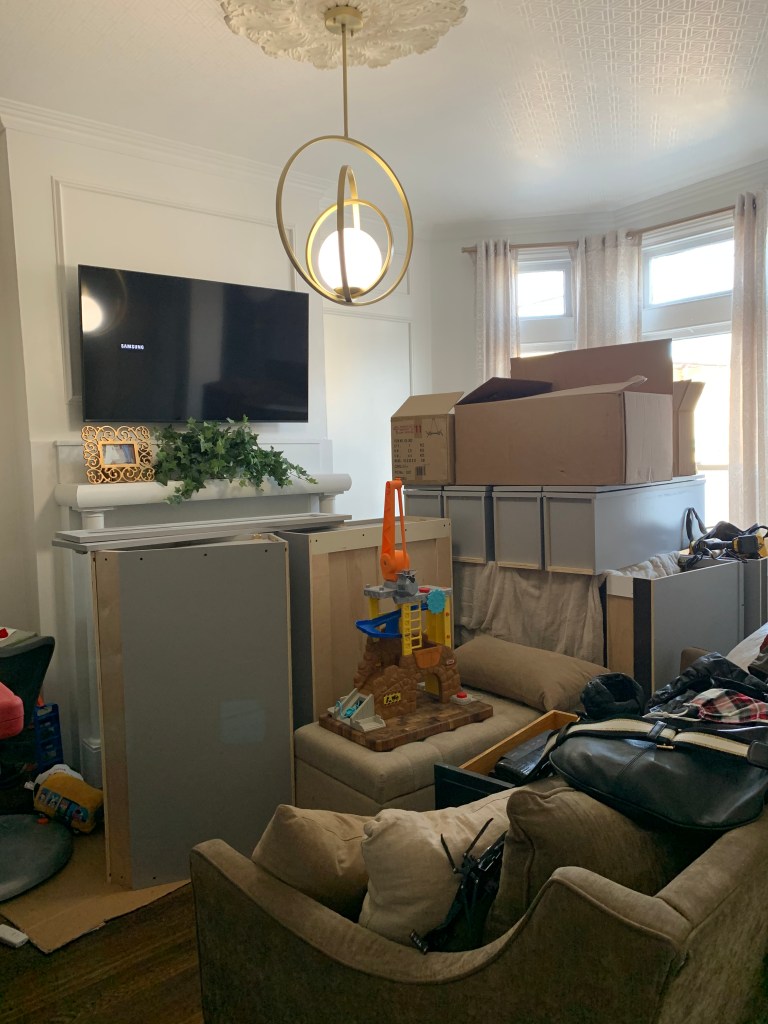
We seriously have been living like this for months. Our dining room looks even worse, but I’m not going to torture you with those images.

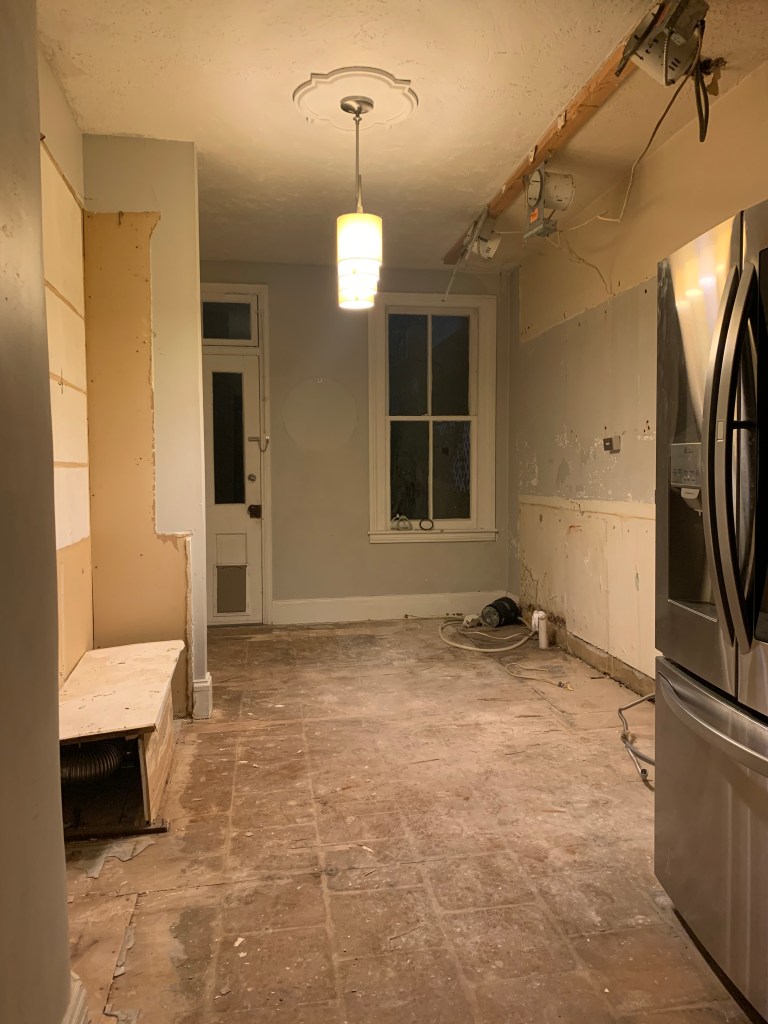
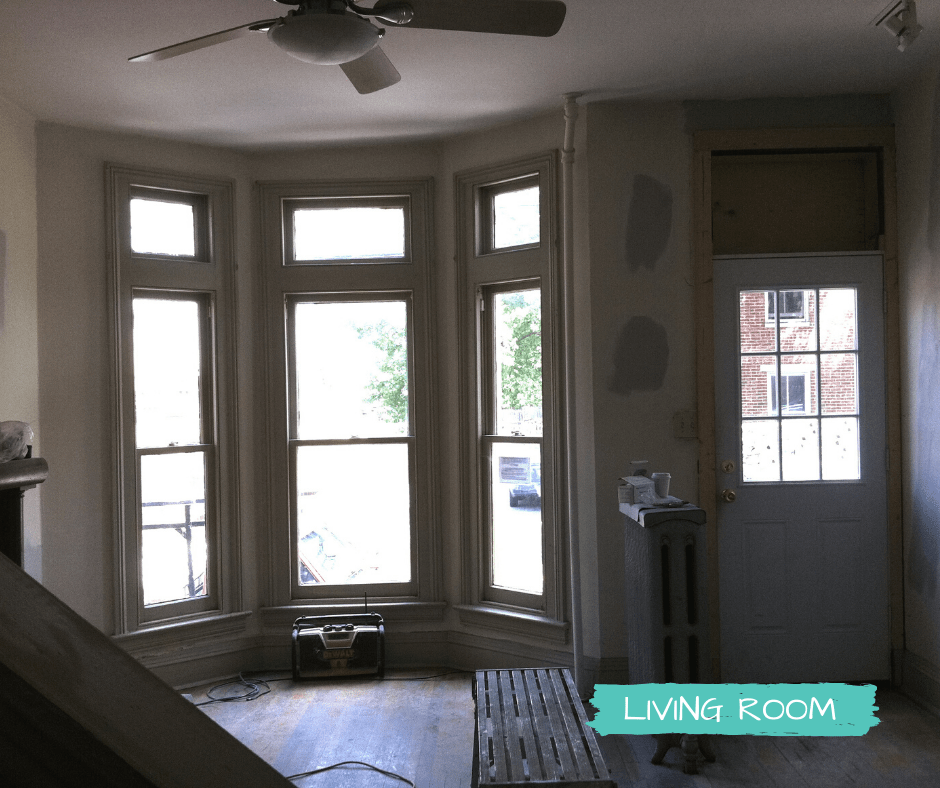
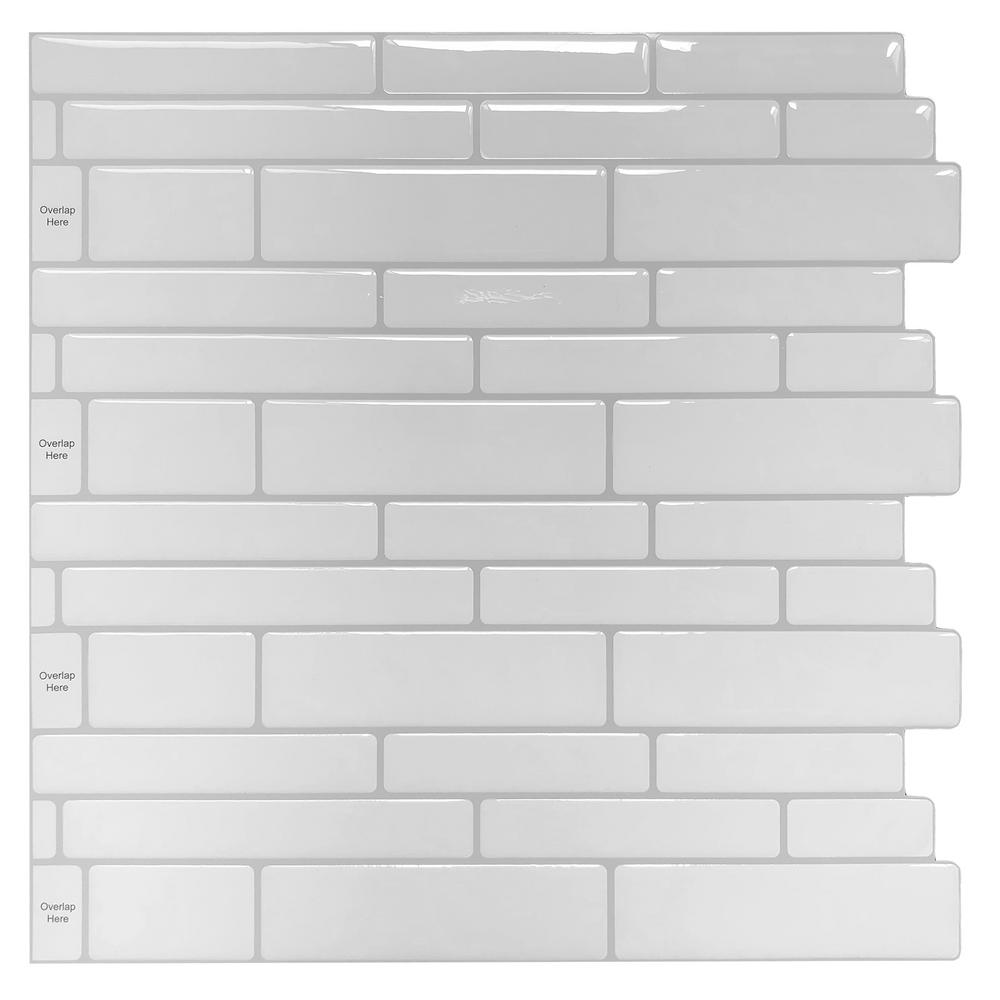
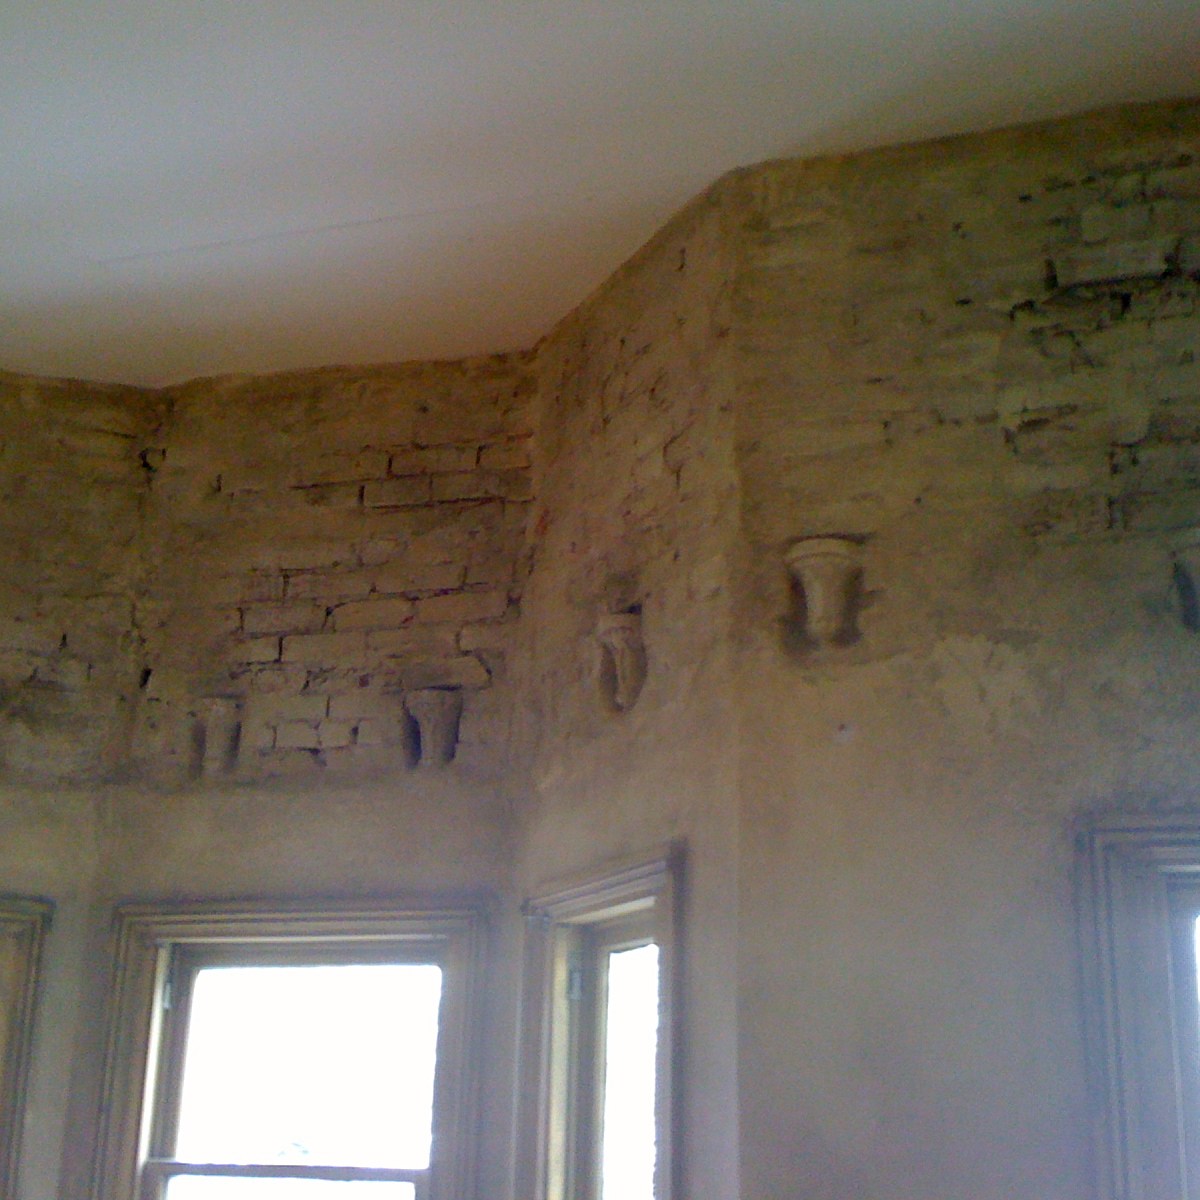
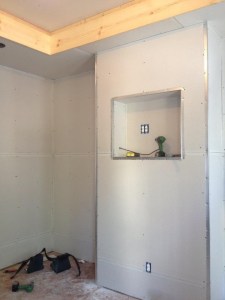
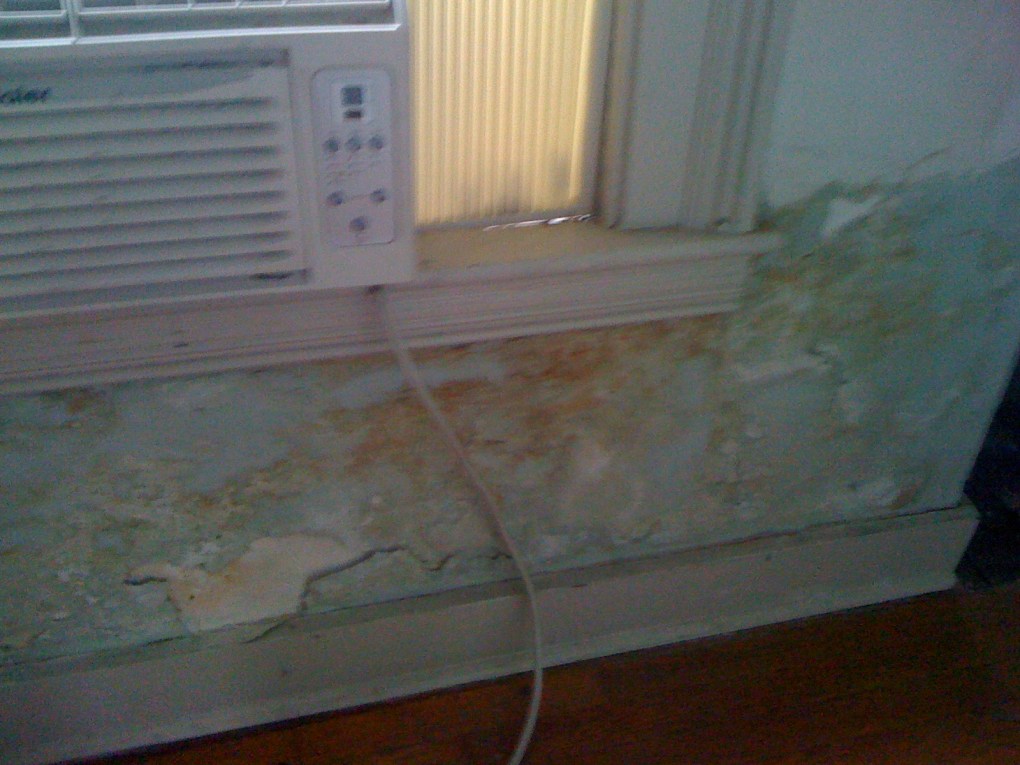
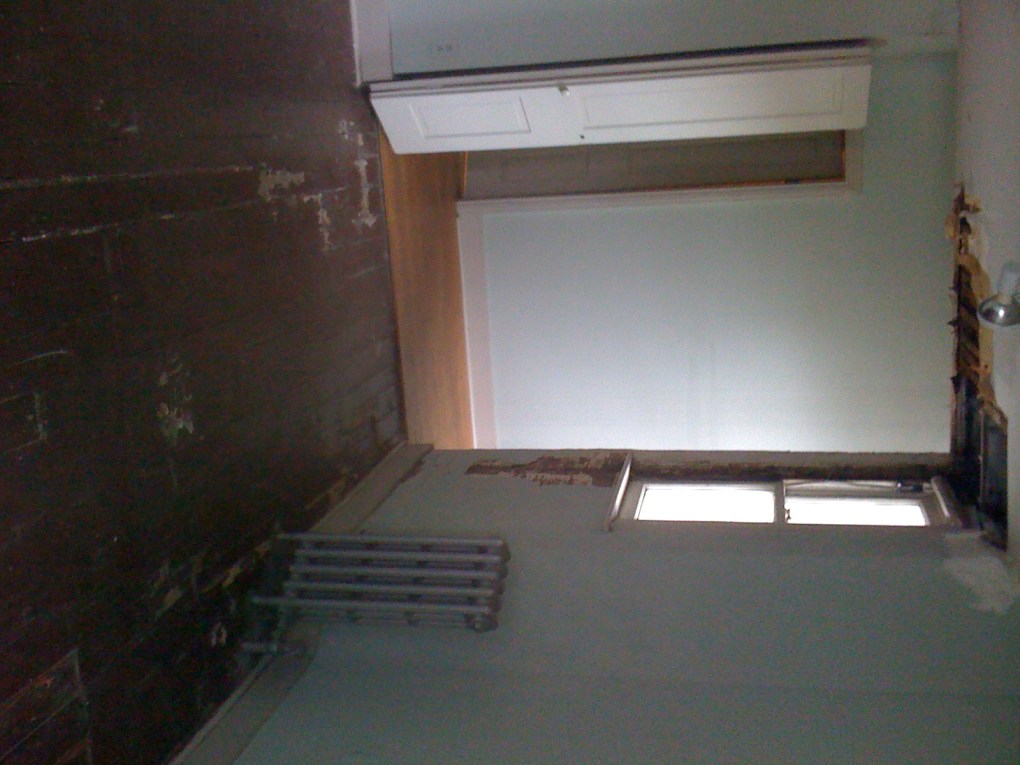
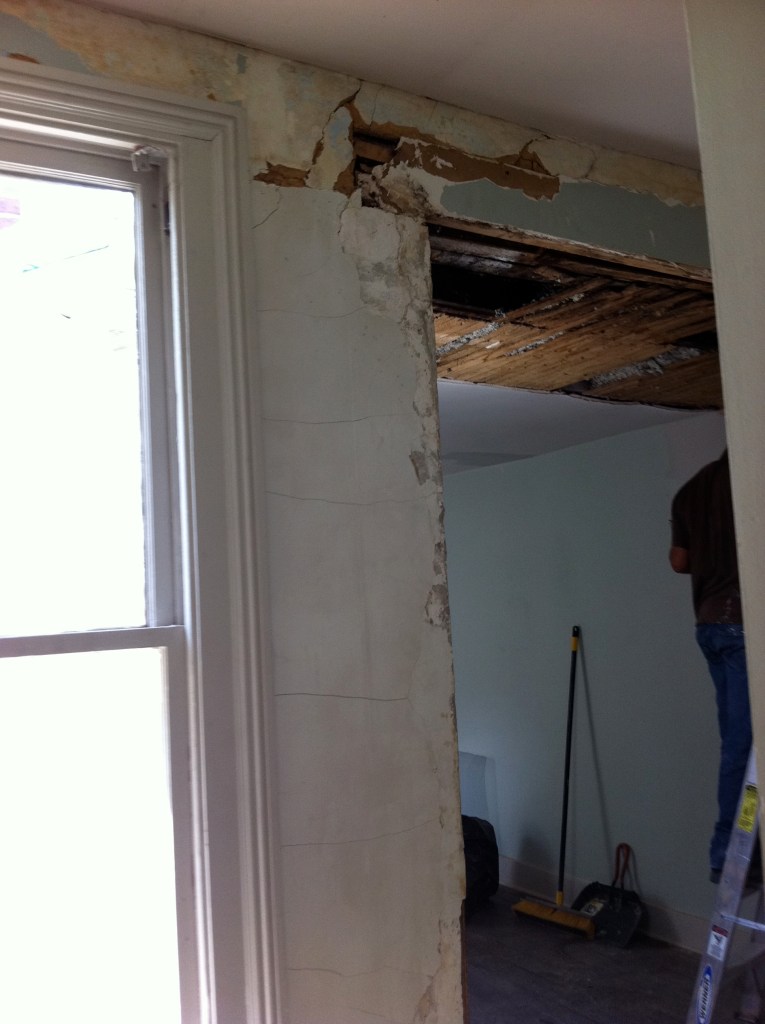
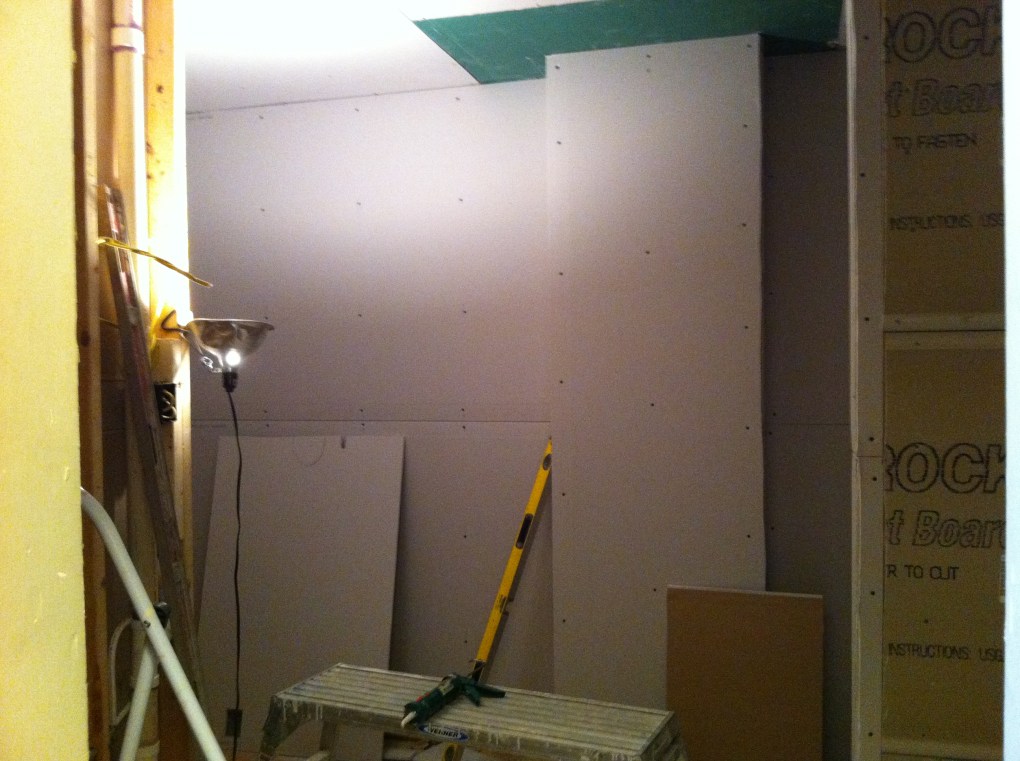
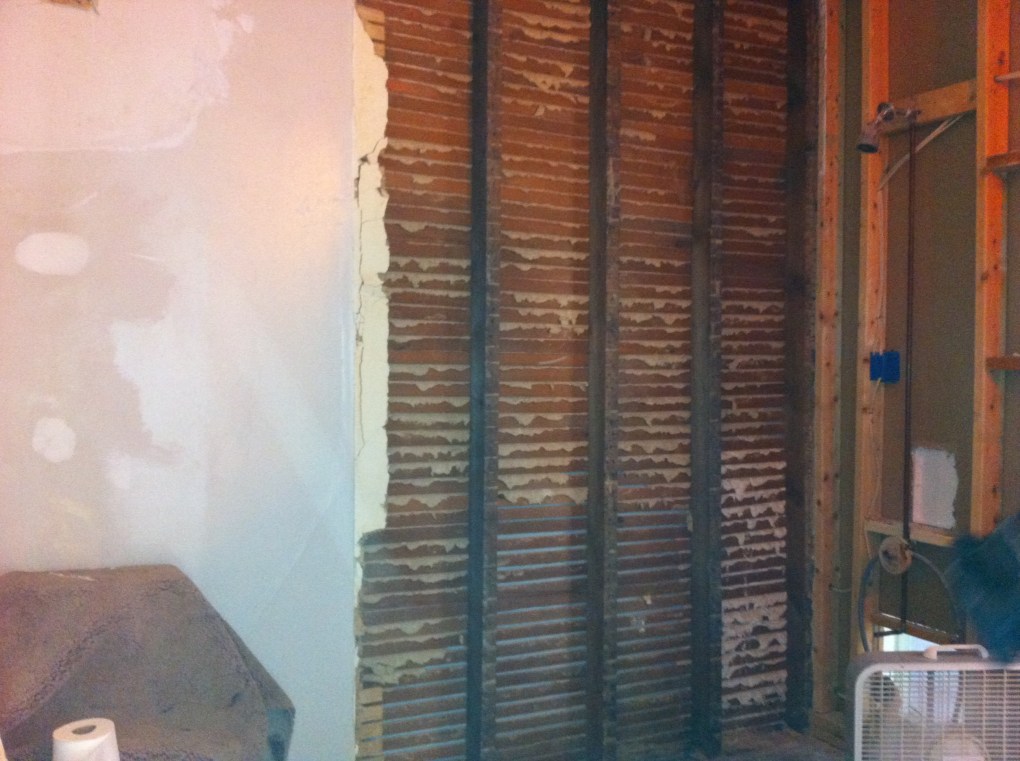
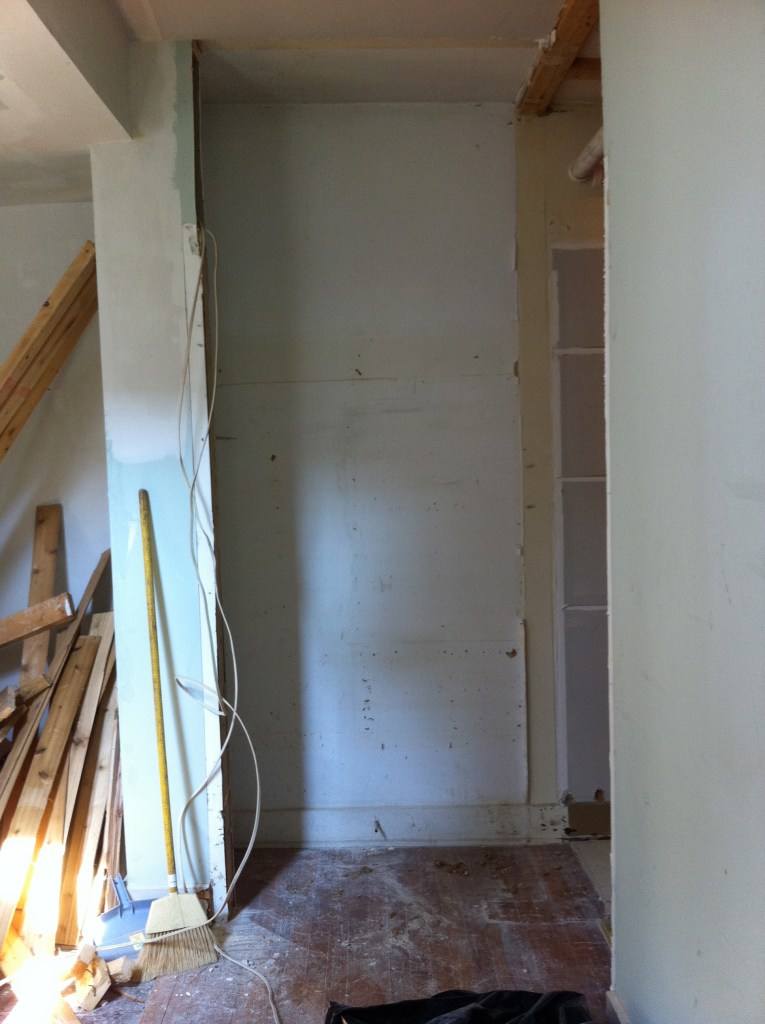
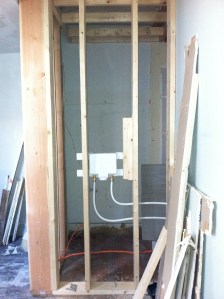
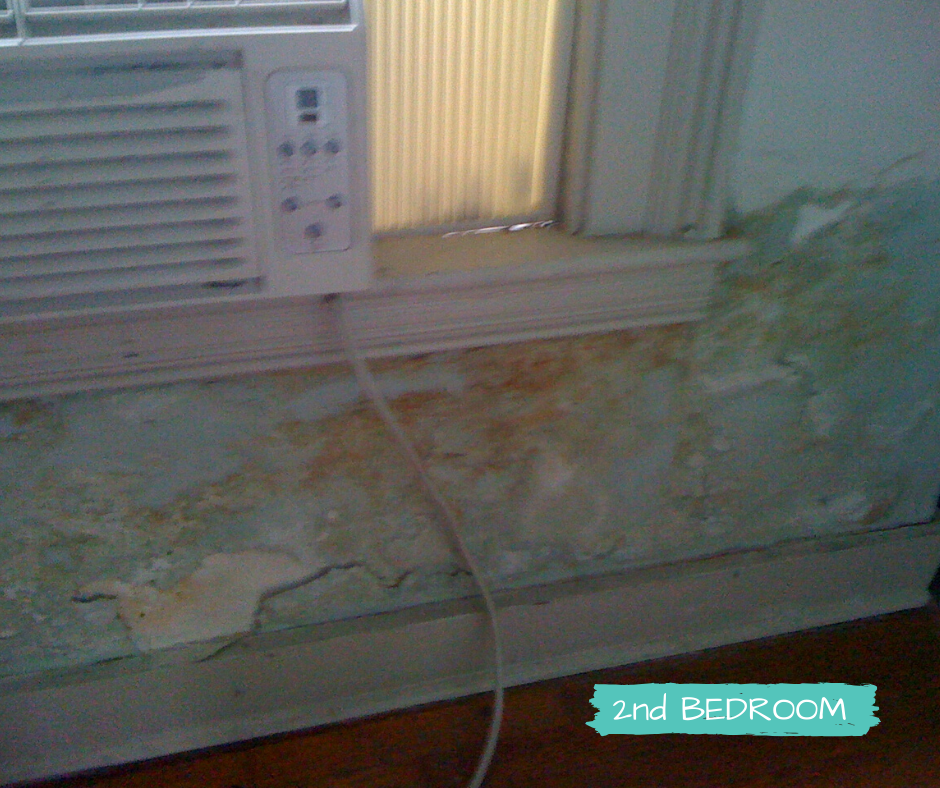
After everything was removed, cabinets torn off the walls and the world’s strongest peel-and-stick floor tiles were pulled up, we had a blank slate.

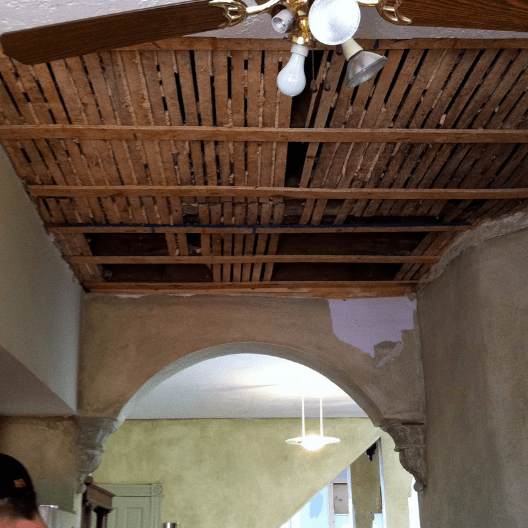
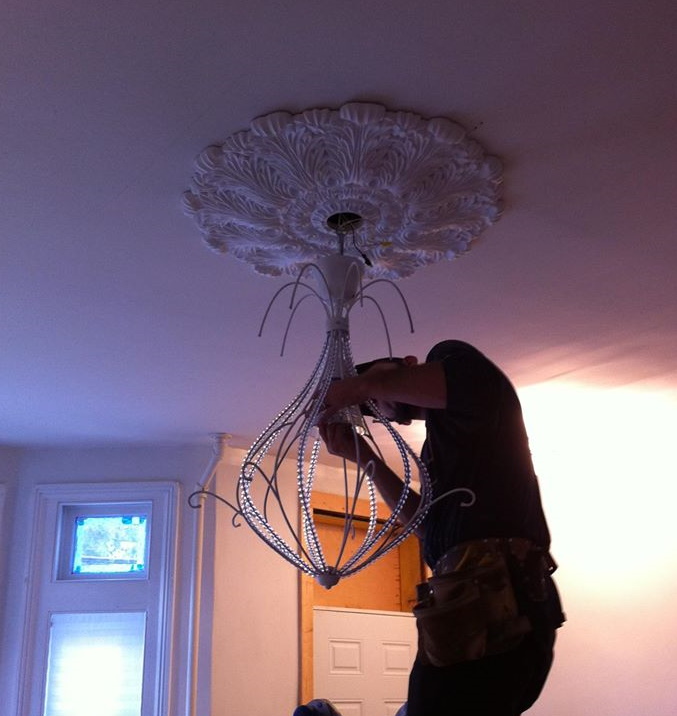
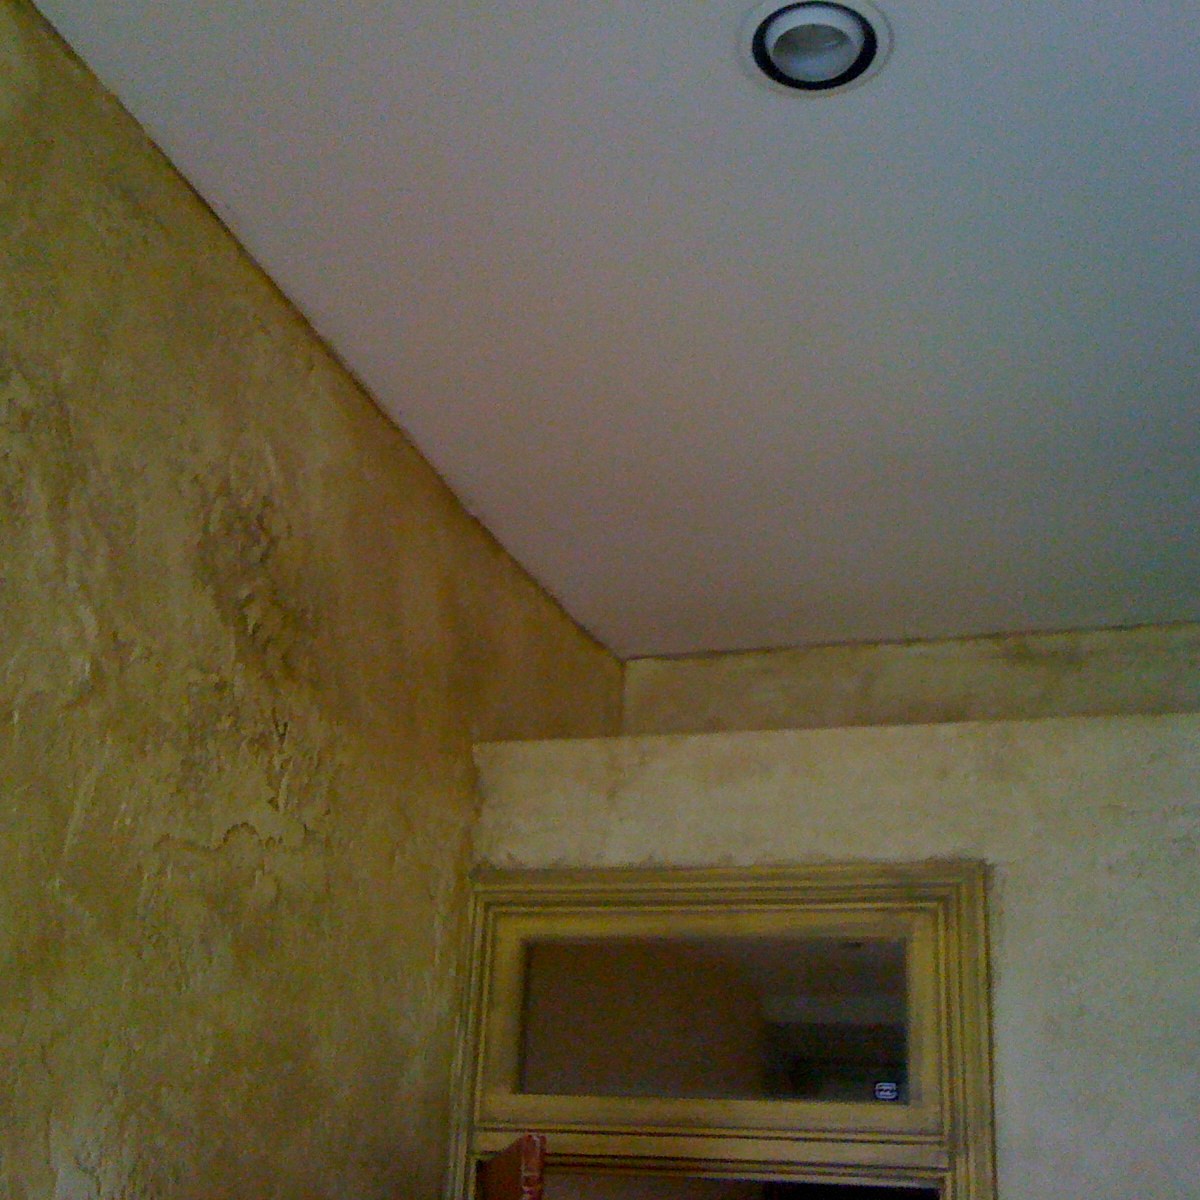
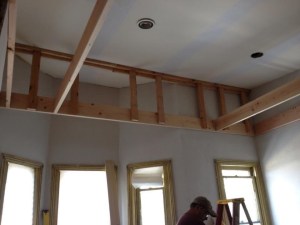
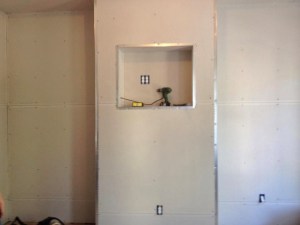
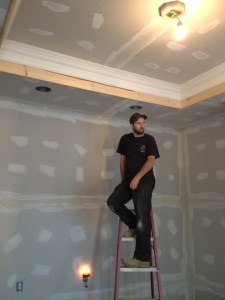
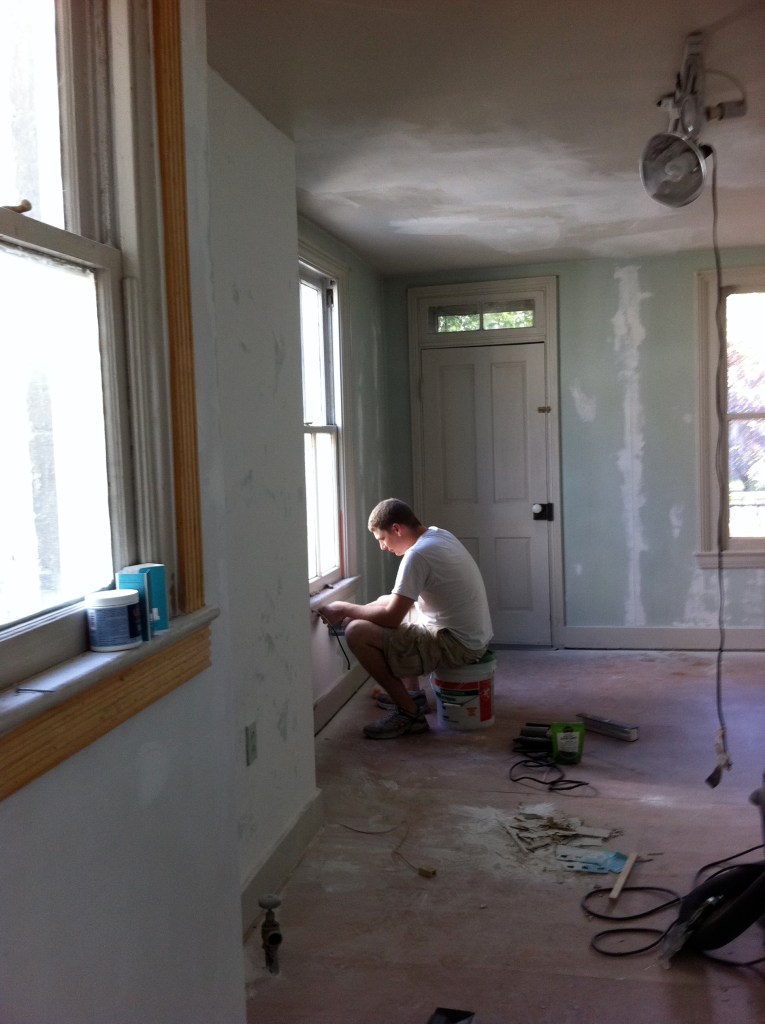
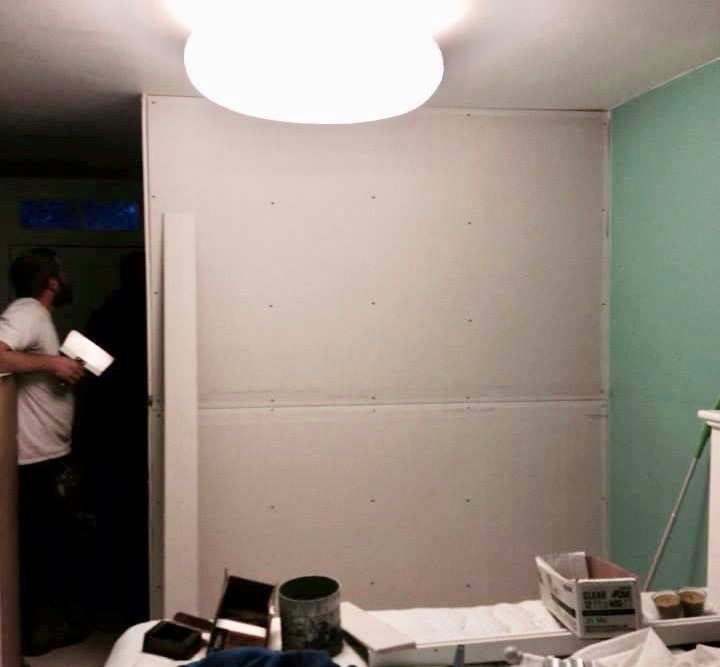
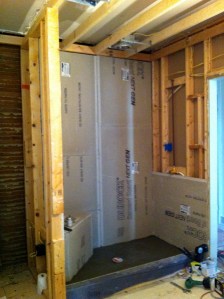
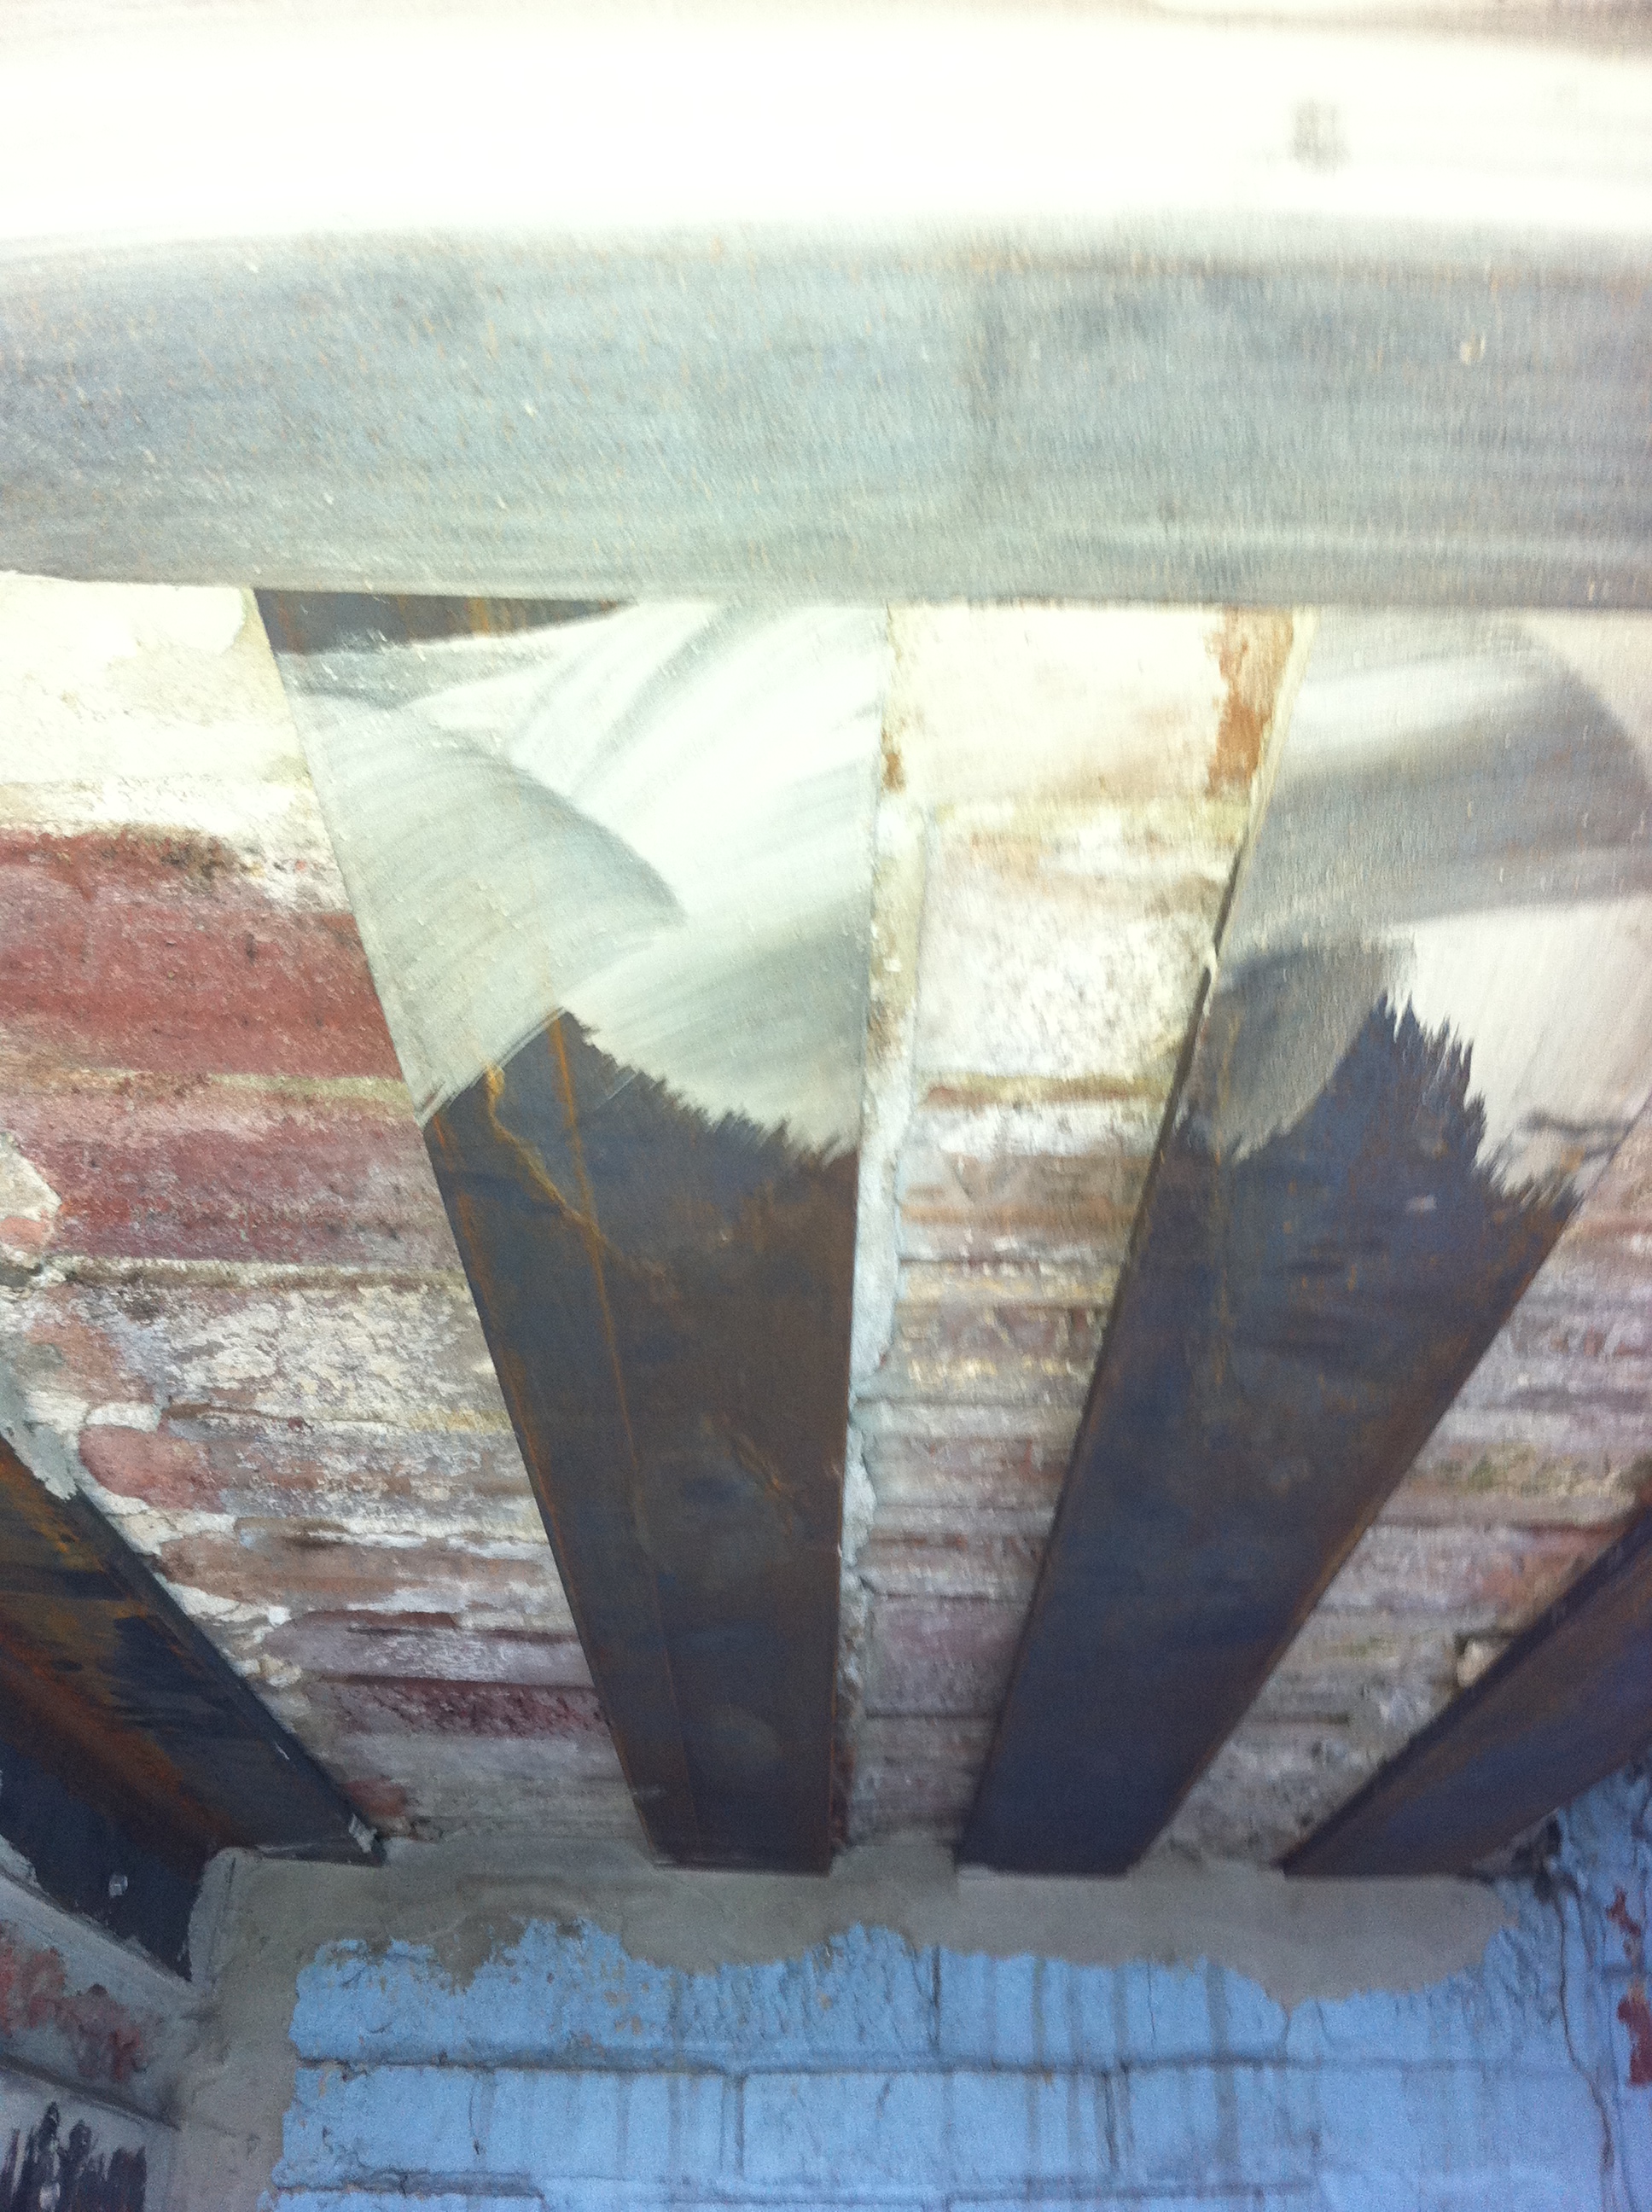
Our horse hair plaster walls that are over 100 years old aren’t ideal, so the first step was to build up walls to hang the new cabinets. We also lost the window in the back right corner in order to create an L and give us more storage. A new ceiling was put in along with the electric run for 4 can lights. Finally, the floors were prepped for tile.

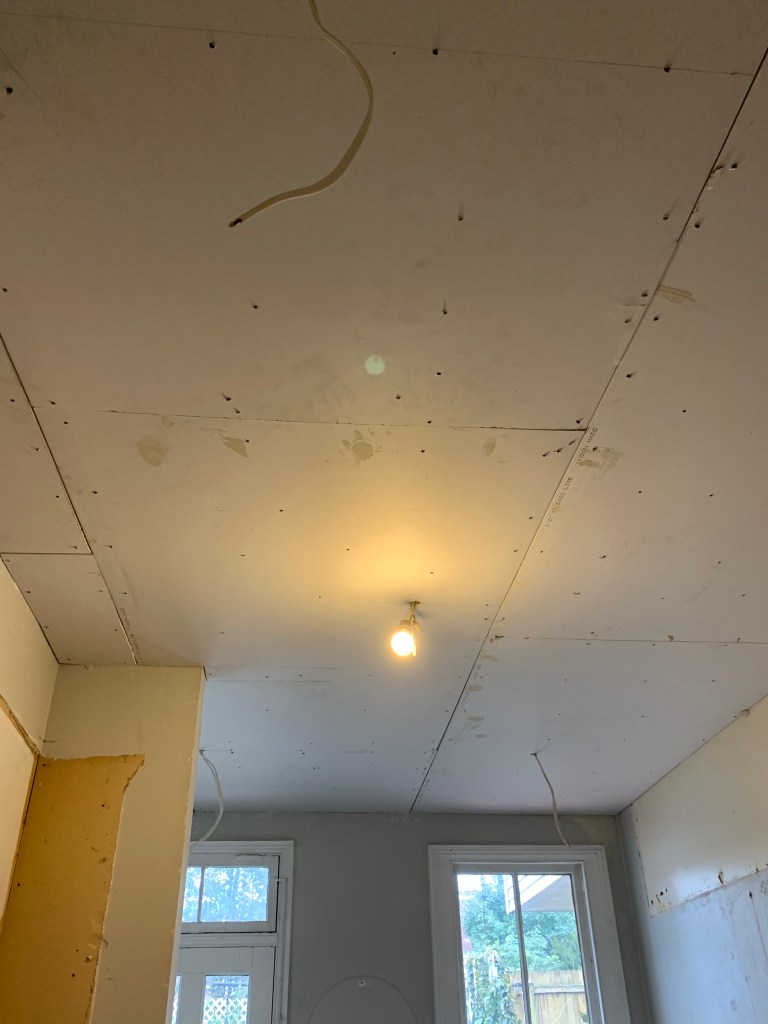
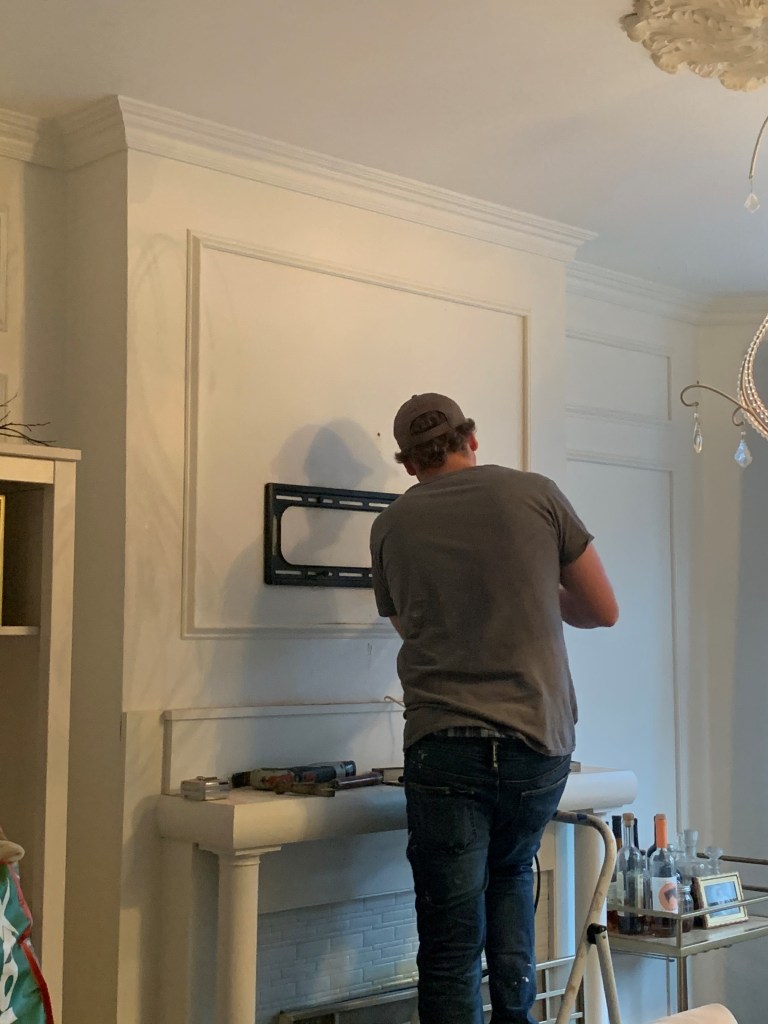
Work such as this is vital and difficult. It’s also the work that is never seen once a project is completed.

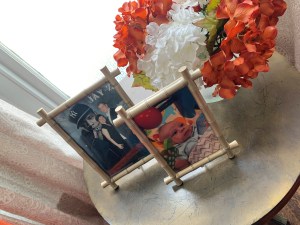
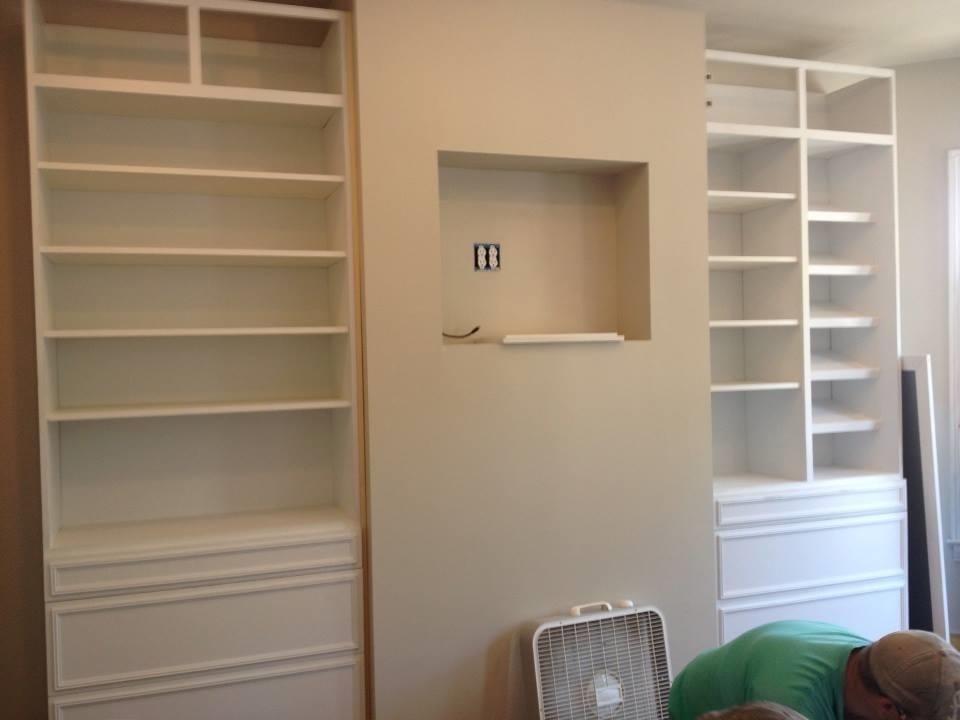
This next photo will rank up there as one of my all-time favorite photos. I just might frame it. It was at this point when I really felt like it was really happening. At long last, cabinets were going onto the walls and getting out of our living room.

I have to give a shout out to Smitty from the crew of Albaugh & Sons. He has put up with my last minute layout changes (which haven’t been simple requests) and he does it all with a smile. Most importantly, he does amazing work!

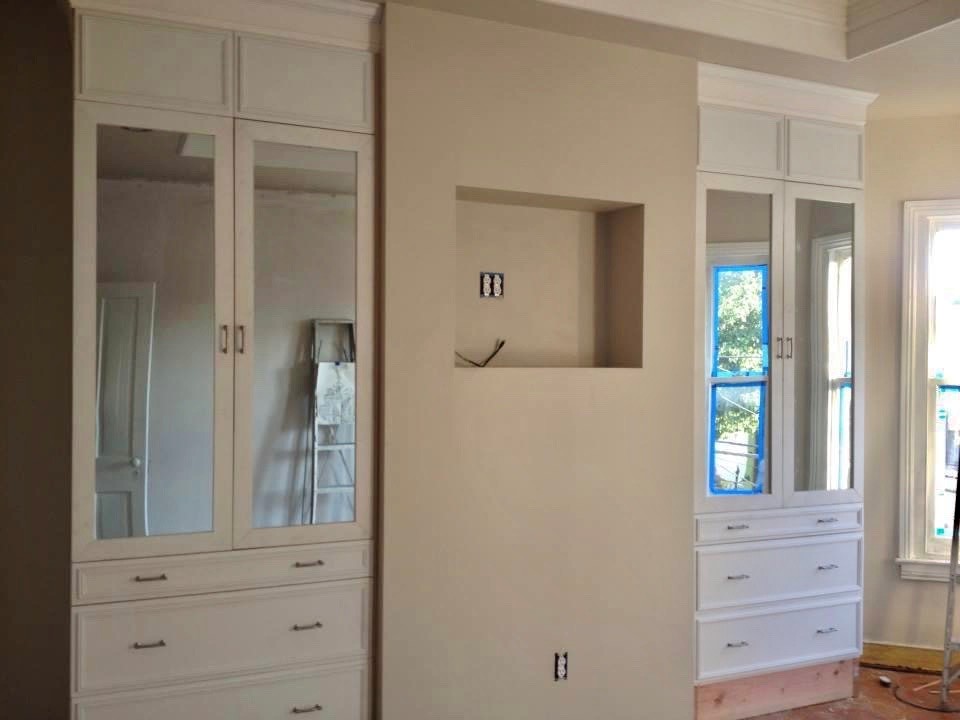
In two short days, the rest of the cabinets where in place.

A celebratory popsicle was required to mark this major step in the renovation.

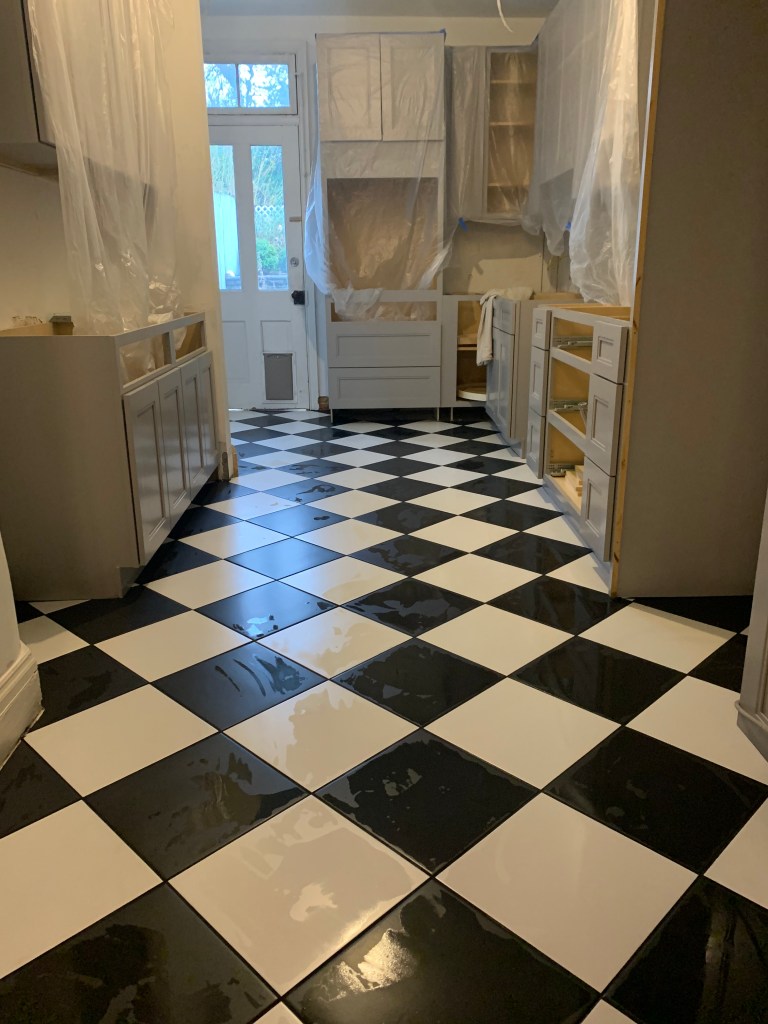
Next up was the floor. To be honest, I was so anxious about the flooring. I’ve been committed to doing the black and white checkerboard tile for a very long time, but I did have a few reservations about how it would turn out. It’s not often that reality matches up to my imagination or vision. I should have never spent a second worrying about this. It is EXACTLY what I envisioned and I LOVE, LOVE, LOVE it! I didn’t even wait for it to dry before taking this picture.

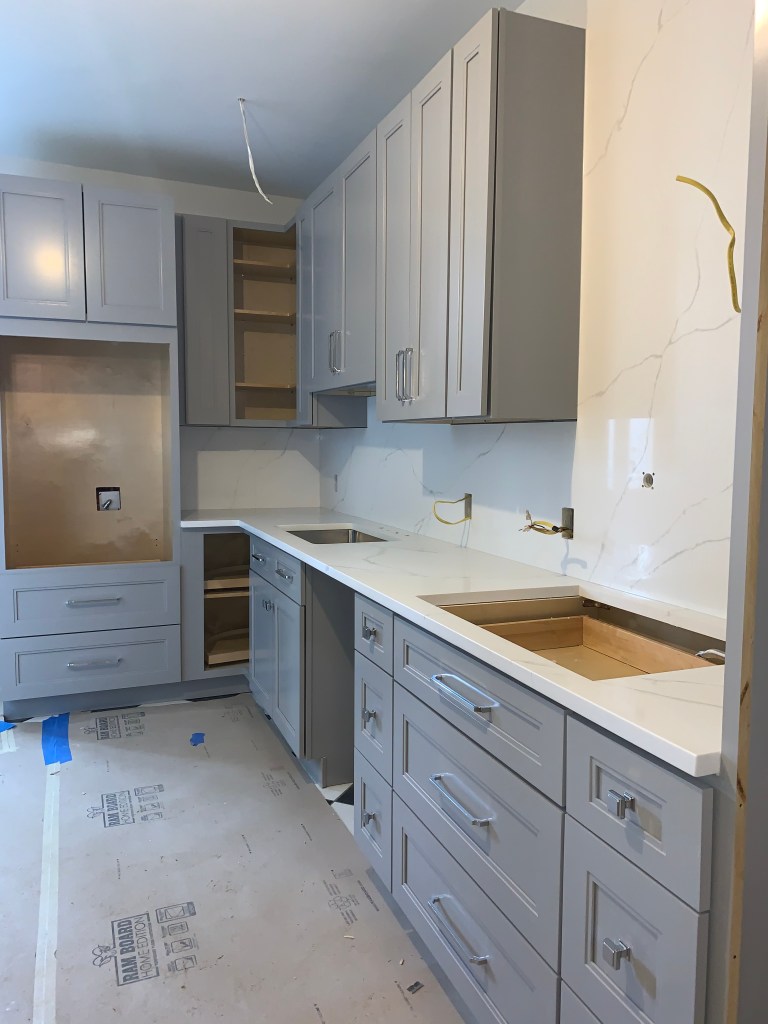
Countertops were installed next. These quartz countertops also surpassed my expectations.

With the good often comes some bad. When I put a few pieces of the white subway tiles up to see what the backsplash would look like, I hated it. The whites just didn’t match enough and I was worried that it would also look a little busy. We’ve got a lot going on with the floor and didn’t want it all to be too much.

I could see the fear in Jeff’s eyes when he came home and I explained that all of that tile that I had bought wasn’t going to work and then I could see him doing the math and getting VERY scared – maybe a little angry. This is isn’t the first time I’ve purchased a large amount of tile that I ended up not wanting. At least this tile hadn’t been installed yet!

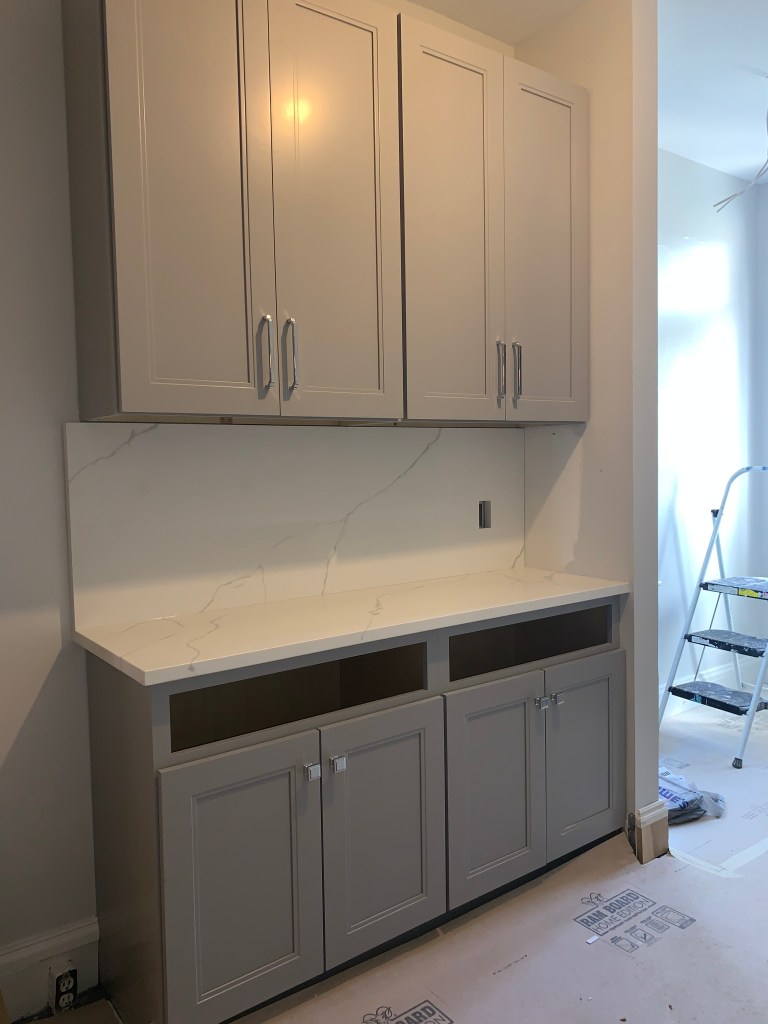
We both had originally wanted to run the quartz all the way up, but thought it would be too expensive. To our surprise, it wasn’t and so we went for it. Of course this added over a week to our timeline, but it was oh so worth it!!

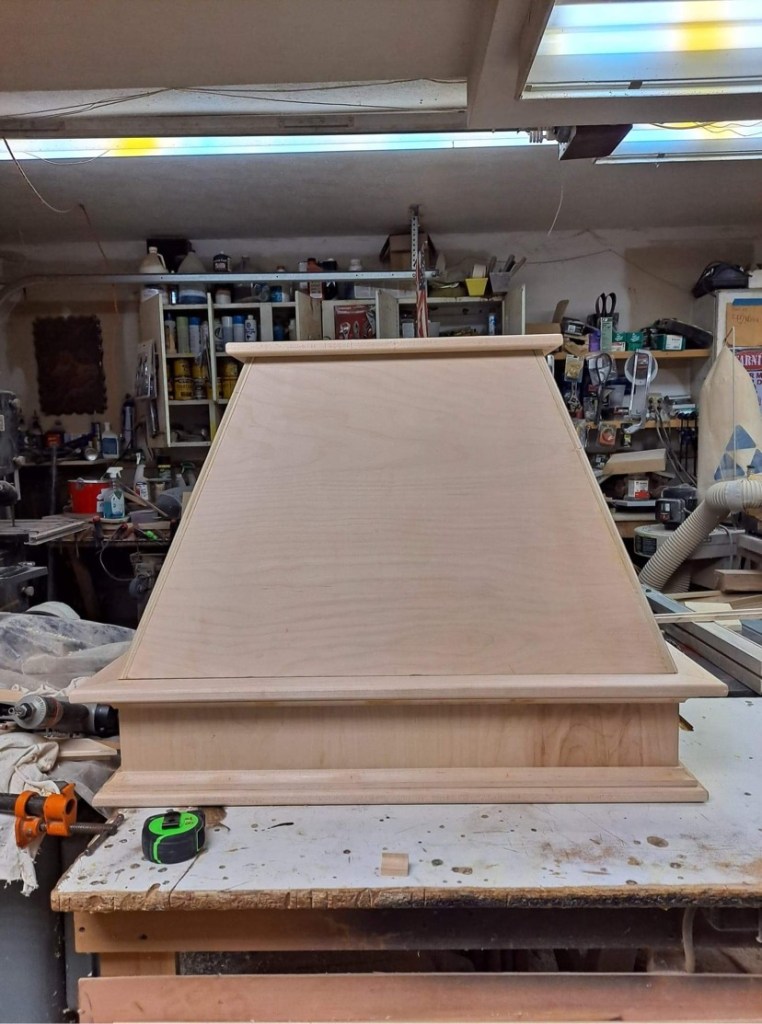
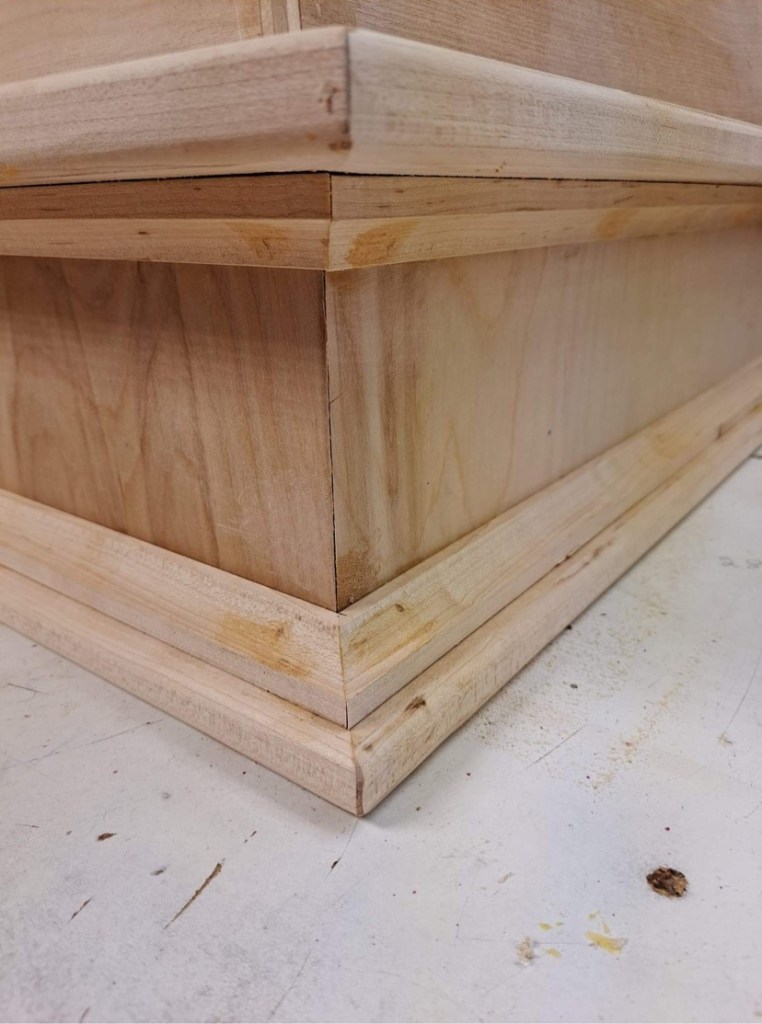
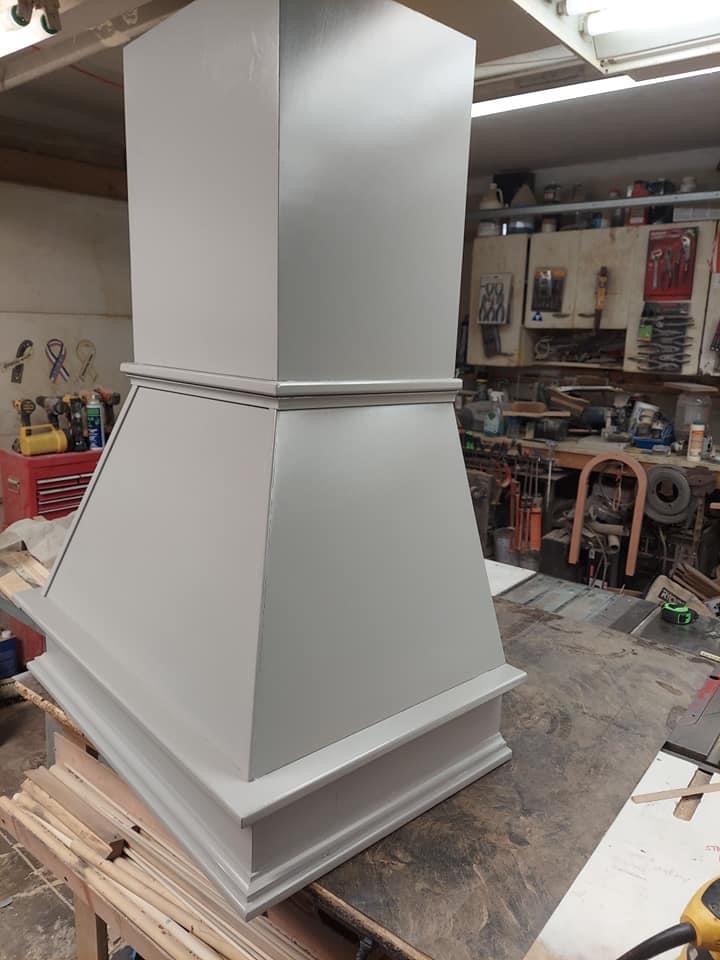
A friend of my father is making a custom hood for us. Over the past few weeks, we received photos of the progress. It is now complete. It is gorgeous and it is just patiently sitting in my dining room waiting to be installed.

The end is in sight, but there is still much to do. I’ll have more progress pics to share in the coming weeks.


Bye, Bye, Bye

This past week, we bid adieu to our kitchen. 10 years ago when we painted the cabinets, put down peel and stick tiles, a very cheap countertop and slapped some paint on the walls, I seriously thought we would be doing a real renovation in a year or two. I was seriously wrong.

A decade later, we are finally getting around to truly renovating the kitchen. This one won’t be a DIY project and my father gets to put his feet up! We have hired Albaugh & Sons to complete the renovation.

Let’s go back, back into time to where it all began. Sadly, we only have these two pictures of the original kitchen, but I think they convey the mess well enough.

If you want the full story on how we updated that mess, read my Don’t Stop Believing post.

Fast forward to the no-so-distant past – last week. Jeff and I packed up way too many champagne glasses, lots of coffee cups, expired food and every last item left in the kitchen.

This Wednesday , the team from Albaugh & Sons got busy tearing everything else out. Now we’ve got a very dirty clean slate.

I’ll do my best to document our progress here on the blog. I’ll share my design plans next week.


Dancing on the Ceiling

We are moving into the living room for this post. Once again, let’s take a look back at what we were working with.

It wasn’t a total disaster in here, so the work was much more cosmetic. I really wanted to keep this room all white, but add interest and texture through architectural details.

Starting at the entry, we replaced the front door. It’s a very basic door. The one I really want is about $2,000 over the budget, so we’ve just gone with something simple from Lowe’s.

We also added new trim around the frame of the front door. The glass was missing above the door and our goal is to replace it with a stained glass piece. Just haven’t found the right one yet.

Next up, the radiator that greets you as you enter this room. It was necessary, but not nice to look at. In just a few days, Jeff and my father built a cover that fits like a glove. It also made this area feel more like an entry.

Just 2 weeks ago, we made a long-awaited update to this radiator cover, a marble top. Only 2 days after a quick trip to A & S Tile to select the piece, it was ready and installed. I LOVE it! We are not done with this area yet. We’ve got more plans and will share them once they come to life.

Earlier I mentioned that I wanted to add texture to this room. We did this in a few different ways. First, to add texture, we added applied moldings to all of the walls. What a difference this made.

For a hot second, I was going to do a stencil inside each panel. I did a few and hated it. It was just too trendy and it pulled the focus away from the moldings themselves.

Applied moldings just add so much sophistication to this room. Lord knows it’s occupants don’t ; )

A second architectural element we added was a decorative ceiling medallion. I found this great one at Architectural Depot. I had a black chandelier from IKEA that we simply spray painted white. The medallion really helped elevate this light fixture and it was much cheaper than purchasing a new chandelier.

That’s not the only thing we did to the ceiling. In interior design, the ceiling is often referred to as the 5th wall and it shouldn’t be ignored. In our master bedroom, we painted the ceiling the same color as the walls to draw the eye up and to make the white tray stand out even more.

In this room, we went with wallpaper. Yup – I wallpapered the ceiling. Well, I didn’t do the actual work – I just picked out the paper! Thibault came through again. Because I saved money on the lighting, I was able to spend a little more on this fabulous paper.

The floors were in surprisingly good shape with the exception of just a few minor spots. We had them refinished and stained several shades darker. We had arranged for them to be done while we were on a trip to Paris. Four hours before we left for the airport, we got the couch stuck in the stairwell trying to move it. Seriously…

We have since figured out that by simply putting the couch on it’s end, it moves seamlessly between rooms.

I never wanted to leave Paris, but we came home to these GORGEOUS floors. They made being home from vacation a little easier.

If you take a close look at that photo, you’ll see that I may have been going through an “owl phase.” There are 9 owls on that mantel. When I do something, I really do it. Sometimes that’s not such a good thing. I’m now over the owls.

At one point, I got bored with the white in here and I actually painted the entire room on a Friday afternoon. This only lasted 2 days. It was back to white before the weekend was over. (I used to have quite a lot of time on my hands…)

You’ll notice that the fireplace surround is brown in this photo. One quick, cheap project that changed the look of the surround was adding peel and stick tile. One day, I’ll spring for marble. Until then, this will have to do. When I did this peel and stick tile was a new product. You can find it everywhere now and it’s a great money saver and super easy to install.

We recently did something that I swore would never do in this room, but I am apparently the Queen of Never Say Never.

That’s Jeff installing the mounting for a TV to go over the fireplace.

When I told my mother what was happening, she said aloud the words I hadn’t yet been able to utter, “What about Christmas?” Yes. Christmas. I go a little crazy at Christmas and I love decorating this mantel.

I guess I’m going to need to get a little creative this Christmas. I’m thinking about just wrapping it up like a big present. I’m sure Jeff would love that!

So here’s what this room looks like today. The owls are gone, but baskets of toys keep popping up. It is NEVER this clean and tidy, but it does fulfill its purpose. A whole lotta life happens in this living room.

What’s next – I really do want a new chandelier. Here are a few I have my eye on.

We also plan to install a section of tile near the entryway. Something with marble to coordinate with the new radiator top. There’s talk of adding a pilar to the radiator cover as well. I know that my father is just dying to start yet another project and I don’t want let him down.

If any of these projects happen, I’ll be sure to share them with you all on this little blog.


Sweet Dreams are Made of These

Our third and final room upstairs is the master bedroom. As I mentioned in an earlier post, it was 3 years after we purchased the house before we started work on this room. There was so much work to be done.

Plaster had been applied to all of the walls and painted in yellow, brown, and gray. Sorry for the terrible photos, but think Olive Garden late 90’s. That was the vibe in this room. I love breadsticks and endless bowls of salad as much as the next gal, but I certainly don’t need to be thinking about food when I’m trying to go to sleep.

I’m certain that I’m just standing there thinking about wallpaper in that picture : )

We had all of the plaster removed and that little closet in the corner was torn out as well. Removing the plaster was a horribly messy job and was done before we moved into the house. The room served as a storage/work area while other rooms were being remodeled.

It is a good thing that we waited to get started on this room as a heavy storm revealed that our roof wasn’t in the best condition. New roof = smaller budget for the bedroom.

Fast forward 3 years and we were ready to get to it. You might have noticed that the ceiling was really high. While it was nice to have a vaulted ceiling, it was wasted space and there was no insulation in the room. We lowered the ceiling and added much-needed insulation.

The vaulted ceiling allowed for us to easily add a tray into the center. Knowing that due to my insomnia, I’d be spending hours on end looking up at this tray ceiling, I wanted to have something worth looking at. I came up with a design and my brother, Josh, brought it to life. I joke that if we move, I’m taking this ceiling with me. I’ll reveal the final design later in the blog.

As for the rest of the room, we removed the horsehair plaster, put up new drywall, and installed can lights. I really do love drywall. If you live in a historic row home, you know the struggle of attempting to hang a simple picture with a nail on a plaster wall.

Like most older homes, this one came with little to no storage and we had ripped out the two tiny closets that were here. My father built these custom built-ins for the master bedroom and they are just about perfect.

One last touch to this room was wallpaper. You can’t go wrong with damask. This print has a shine to it that instantly caught my eye. I’ve always been a fan of Thibault Wallpaper. Their prints are classic with just the right touch of modern. This one is Arturo Damask in Metallic Silver from the Monterey Collection.

For the rest of the walls, we went with Dove’s Cry by Valspar. This is one of those perfect colors that can go tan or grey depending on the room and the light. Plus, how perfect is that name??

Now for some after photos.

I know I’m a broken record when it comes to having big ideas and a small budget, but I truly believe that you can bring your vision to life without breaking the bank. Here’s how I saved a bunch of money in this room.

  1. The wallpaper. I only did an accent wall. This saved on the cost of materials and labor.
  2. The bed – I picked up our headboard at a Restoration Hardware outlet. I saved 60% off the retail price.
  3. Those little nightstands – I found them at Gabe’s of all places. Don’t sleep on places like Gabe’s – you can find some great, cheap things there.
  4. The comfy corner chair and the accent pillows – HomeGoods finds.
  5. Euro shams and sheets are from IKEA.
  6. Curtains – I desperately wanted to have curtains custom made in the material that matched the wallpaper, but that wasn’t going to happen. I found these at TJMaxx, they went really well with the wallpaper, but they were too short. I purchased a few yards of linen fabric that matched the headboard and added it to the bottom.

My sweet dreams are coming true as we renovate this home. Next week, we will move to the main living area that is still work in progress and more fodder for my dreams.


Sweet Child O Mine

We are going to stay upstairs and take a look at the renovation of what is now a nursery. This was one of the worst rooms in the house when we bought it. Water damage from a leaking roof, black mold, and there were even mushrooms growing inside the window sills – no lie.

Let’s take a look at what we were up against.

My grand plan for this room was for it to be a small guest bedroom with a huge walk-in closet. This is what I was envisioning…

Once again – my budget and my grand plans didn’t quite work well together. We also realized that it would be at least three years until we would be able to work on the master bedroom and we’d be bunking up in here until then.

Jeff and my father got to work and it felt like every square inch of this room needed help.

After repairing all of the damage, putting in new windows, hanging new drywall, a new ceiling and new floors, our budget for this room was shot. We could do little more than paint the walls and bring in our old furniture.

At this point in time, I still had an unhealthy obsession with Tiffany & Co. I thought it might be fun to have a bedroom that looked like a jewelry box. We had laid white laminate flooring and I started my search for the perfect blue.

In the end, we chose Nautical by Valpar. There is a reason they refer to a little blue box and not a big blue box at Tiffany’s and that reason is that this color is overwhelming in large format. It got old after a day, but it stayed up for close to 4 years.

We weren’t able to put in a closet, so we had to make it work with our pair of IKEA wardrobes. I painted my 10-year-old furniture white and we had our little jewelry box pretty full. I only have 2 random, grainy photos and from the room at this time and one actually has some jewelry – none of it from Tiffany’s!

A few years later, I finally got my closet. Not the SJP closet, but a closet none the less. I was over the moon the day this drywall started going up.

After two short days, I had my closet and even lived my SJP SITC closet fantasy for a second.

Upon the completion of the closet, we pulled the trigger and repainted the entire room. Yet again – a bold choice. Plum Good from Valspar. We didn’t have to look at this color very long as we were already starting to work on the master bedroom.

I thought this room would remain a guest room forever and perhaps magically turn into the closet of my dreams. What I NEVER could have imagined is that it would have a permanent resident. In 2018, this room underwent another, major transformation. It became a nursery.

I did have a LOT of fun working on this nursery. I wanted to create a design that would last long after the crib was gone. After months of design planning, here is what I came up with.

You knew this room was going to be grey, but I had to bring in a little more color. I was seriously considering a mural for the back wall and found many amazing ones on Etsy.

What held me back was the longevity (and budget) so I went with wallpaper. Shopping for wallpaper is one of my favorite things. Choosing one is one of my least. Here were the contenders.

Part of me thinks I should have gone with the first one, but I played it safe and went with #3. Now that the hard part was over – time for some furniture.

My favorite piece in the room is the rocker. I found this gorgeous Mellinger Rocking Chair at All Modern. I sit in it all of the time. I will never get rid of this chair.

I thought my days of IKEA were behind me, but I loved their Sundvik series and got the crib and wardrobe.

IKEA came through for a great dresser as well. This thing holds a TON of baby clothes.

I didn’t like any of the colors or stains, so we painted it – you guessed it – grey. This dresser, while functional, was a pain. Putting it together was not exactly fun nor was painting it.

We went with Earl Gray from the HGTV Home collection from Sherwin-Williams for the dresser.

For the walls, we chose Repose Gray also from the HGTV Home collection from Sherwin-Williams. It has just the right brown undertone and went perfectly with the wallpaper.

So here’s what this room looks like now that it is complete.

I picked up those sweet felt mounted animals at the Union Square Christmas Market in NYC. I did a little dance when I found them! Brant’s engraved wall art was an Etsy find thanks to Engraved Happyism Team.

For a room that I thought would never exist, I has become my favorite room in the house. That SITC closet is going to have to wait for about 18 more years.


So Fresh, So Clean

Last week you saw the before of our bathroom. If you happened to miss it, you can check it out here.

This week, we are sharing the after. Actually, the after, after. Let me explain. I’ve mentioned before that I’m bringing an old blog back to life. As a result of not keeping up with that old blog and not thinking I’d ever bring it back, I don’t have a single picture of the bathroom after it was completed in 2011. I do have some of my old design notes that I can share.

I had some pretty bold plans for that little bathroom. As usual, all of them over budget and just a bit eccentric. Here were our final selections.

For the paint, we went with Martha Stewart’s Precious Metals in Eagle Brown. Terrible name, but beautiful color. Her precious metals collection had a gorgeous shimmer – not glitter – shimmer – we were trying to keep it classy. It was a perfect compliment to my tiny bubbles in the shower.

For fixtures, we went with the Bamboo collection from Glacier Bay in brushed nickel. Clearly, Don Ho had a bigger influence on me than I thought. We wanted double sinks, but we had very little room. Leave it to IKEA to have a solution. Their BRÃ…VIKEN sink’s trough-like design allows for two faucets in a smaller space. We went with one large round mirror to “mirror” the accent tiles in the shower. We kept the light fixtures clean and simple.

While I don’t have an after photo, what I do have is hindsight and photos of a slightly updated bathroom.

Let’s tackle that hindsight.

  1. The paint. That paint really was fabulous but it made that bathroom feel so small and dark. I was going for a spa look but got a cave instead. Great for hibernating, terrible for getting ready in the morning. The paint’s saving grace was the shimmer. It did reflect light nicely. But that shimmer was a blessing and a curse. It was a nightmare to do a touch-up with that paint. It NEVER looked right. We had to repaint an entire wall, not just the tiny bit that was nicked. On a trip to Home Depot to get more of it, I found out that the entire line was discontinued. Time for a new color and no shimmer!

  2. The sink. It works and it gives us two faucets. What it doesn’t do is provide space for anything more than a toothbrush holder, a soap dispenser, and a small mirror. I am a big fan of a clean, clutter-free countertop, but getting ready is a real pain in the ass. I have to put everything in the sink basin. Countless little hairpins have gone down the drain and I am convinced that I’m going to be electrocuted by the hairdryer. Because it has no legs and is mounted to the wall, I live in fear that it will just pop off the wall and onto myself or Brant and crush us.

  3. The heated floor. I’m as stubborn as they come and when the salesman told me that I would never use that heated floor, I vowed to prove him wrong. It’s been 9 years and we have probably used it less than 20 times. The only time it has really been useful is after a long night of drinking and karaoke when sleeping on the bathroom floor just feels like the right choice.

So now for the update. It’s a good thing that paint was discontinued. Gave me a reason to find a new color. I went with my favorite – GRAY!

The paint really made the bathroom feel much bigger and so much brighter. Not to mention, so much easier to touch up when needed.

Don’t think that I’m done in here. I want a new vanity that doesn’t threaten to kill me and I would love glass doors for the shower. I also hate that toilet. Check back in a year – I might have another bathroom update. OR my husband, not the vanity, will have killed me by then.

Like what you see? Shop this look. While many of the items in my bathroom have been discontinued, I’ve found a few great substitutions.

Round Beveled Polished Frameless Decorative Wall Mirror

We found our sconces at Home Depot, but they have been discontinued. I’ve found some great alternatives that, quite frankly, I like a little more…

My tiny bubbles have also been discontinued, but here are a few great options.

Floor & shower wall tile – Adessi Millennium Ivory Porcelain Tile

Wall color – Whirlwind by Olympic available at Lowes.

Trim color – Summer Gray by Valspar available at Lowes.


Tiny Bubbles

For some reason, some of my most vivid childhood memories are of the bathroom displays in the Bon-Ton at the Uniontown Mall. Yes, I am fully aware that most people do not look back on their childhood and remember such things – they usually think back on dance recitals, ball games, vacations… I think about the mall.  This gives you a bit of insight into not only my love of shopping but also a bit about how most of my time as a child was spent – in the mall – with my mom – most likely returning things  – and buying new things that would soon be returned.

My absolute favorite display was all white and had fake bubbles coming out of a teeny tiny tub. I don’t know if I imagined it or if they actually had the song, “Tiny Bubbles”by Don Ho playing in the background, but that’s how I remember it.. and I just loved that display. I even named it “The Don Ho Bathroom.” Not too creative, but give me a break, I was a child. When I stood in silence, looking at The Don Ho Bathroom, I was transported to a clean, calm place. I wanted to take that display home, put it in the corner of my bedroom and listen to Don Ho all day.

Now I am finally able to design my own bathroom. Unlike the dream bathroom of my childhood, there is very little white and it won’t even have a tub. I will, however, find a way to get “Tiny Bubbles” playing on a loop in there!

We probably won’t have a finished bathroom until late August, but an enormous amount of work has been done to it already.

A few weeks ago, my father brought with him the “big guns” aka Josh and Frankie.  Joshua is my brother and owner of Cooleytown Construction and Frankie is the lead carpenter. They managed to accomplish in two short days what would have taken Jeffrey and I three months to do. Actually, that’s a lie – Jeffrey and I could have NEVER been able to do what they did.  

Like the majority of houses in the historic district, we have horsehair plaster walls. I cannot wait to have drywall that I can actually drive a nail into in this house.

Just a reminder where we started…

And now for some demo and progress pictures…

Bye-bye horsehair plaster…

Bye-bye closet…

Bye-bye tub…

Hello framing and hardie board and plumbing!

These photos do not do justice in showing the amount of work that they did in those two days. Shower walls went up and plumbing is ready for fixtures. My bother wired the bathroom and even put up with my demands of moving outlets and lights around.  A heated floor was installed, which the salesman at Lowe’s warns us that we will never use.

We removed a small closet from the back room so that we can move our washer/dryer from the deep dark recesses of the basement and into the bathroom. Jeff wants to replace the washer and dryer, but despite its age and appearance, I’m holding on to it.

Here’s a quick look at the floorplan.

As for the design of this space. I’ve had a LOT of ideas and some pretty grandiose plans for that shower. None of which are truly in my budget.

When designing this room I was really going for a modern, warm, natural feeling. I wanted it to be sleek and classic with just a touch of whimsy.  Of course I had dreams of an over-the-top custom Ann Sacks tile installation in the shower and the very best fixtures that Kohler had to offer. Not only did I have a budget to keep in mind, but I also had to create a space that will help with resale. To quote Marie from When Harry Met Sally, “Everybody thinks they have good taste and a sense of humor but they couldn’t possibly all have good taste.” This, my friends, is why you must think about resale value when designing your home.

Here are just a few of the designs I’ve been contemplating.

**Keep in mind, I am republishing these blog posts from over 9 years ago. I too am laughing at some of the designs I had come up with!

Realizing that our budget would have been blown on tile with no money for a toilet, I had to come up with a budget-friendly solution.

Inspiration came while my mother and I did what we do best, we went shopping. A stop at Mid-Atlantic Tile revealed the answer to the budget-busting bathroom design. I think it was a little sign from Don Ho as well. You didn’t think I had forgotten about him, did you?

The accent tile is my “Homage to the Don Ho Bathroom” These are my tiny bubbles…

And here is a little peek of those tiny bubbles installed in our shower.

I’ll share more updates on the bathroom in the coming weeks and I’ll leave you with this gem from demo day.

And just for fun…


Every Little Step

THE STORY

Last week it was NKOTB this week I’m thowin’ it back to Bobby Brown. Can you tell when I grew up yet??? 

Keeping with the theme of steps, I thought I would share our stairwell transformation. This is a great one. 

Here’s where we began:

Our first not-so-little step was to strip the stairs. This was grueling work and Jeff did the lion’s share.  

A railing was even missing, so we stole one from the hallway. 

When we purchased the house, we were engaged to be married. We thought it would be fun to have our engagement photos taken in the Money Pit. I love juxtaposition –  beauty and ugliness, darkness and light. The current state of our house provided the perfect backdrop for us to get dressed to the nines and pretend to be models for a day. Here are a few photos taken on the stairs. 

Shout out to Brad Barnwell, Frederick’s favorite photographer. He’s been with us through all of our most important events. Please reach out to him if you are looking for a photographer! Check out his work here. You’ll see more of these engagement photos on future posts too. They get a little crazy!

Although my thigh is now larger than my waist was when this photo was taken, I still have this dress. It’s one of my favorite pieces. I found it at my friend Jen’s shop, Venus on the Halfshell in downtown Frederick. She names many of her pieces and this one is called “Daddy’s Little Spoiled Brat.” So perfect!

Back to the stairs… 

We were making very slow progress painting these stairs and the walls were just too high for us to deal with. I think it took me 8 hours to finish these spindles.

We decided to call in a professional. Dave De Leon of  De Leon Painting came to our rescue. In just a few days, our stairwell was transformed. Here’s a great side-by-side before and after.

The niche looks really great. I wanted a chandelier in there and I guess I got one : )

We’ve had a lot of wear and tear on these poor steps and the walls. They were in rough shape. During the quarantine, Jeff repainted not only the stairs but also the walls and niche! We also updated the sconces. The old ones just weren’t fussy enough. These are worthy of the art. 

Jeff really dislikes the baroque frames on the wall – likely because they have fallen off the wall and hit him in the head on more than one occasion! I love them and I’m thinking of getting silhouettes of Brant and Rogue done to place in them.

Here is a sneak peek at the stairs that lead to our basement and my favorite light fixture in the house.  We’ll save the full basement reveal for a later post.

THE MATERIALS

Like what you see? Here are the paints and fixtures and artwork we used. Click on the links to shop our space.

The light fixture in our lower level stairwell is the Powell LED 3-Light Semi-Flush with White Globes, Aged Brass from Lights.com.

Wall color is Icy Avalanche by Sherman Willimas available at Lowes.

Spindles, risers and wall trim are in Summer Gray by Valspar available at Lowes.

The niche color is Pencil Point by Behr available at Home Depot.

Stair treds, handrails and posts are in New Black by Valpsar available at Lowes.

Our sconces were purchased from Pottery Barn, but they no longer sell them. I’ve found a similar sconce at a great price from BeautifulHalo.com.

The black baroque frames came from IKEA of all places. They are the Ung Drill Mirrors that are now discontinued. But you can still snag them at Refinery 29. Who’d have guessed something so fussy could be found in the land of simplistic Scandinavian furnishings!

The large canvas that hangs in the niche was a Home Goods find, but you can find many like it at Wayfair.


Step by Step

If you are like me and are still in love with NKOTB…you’ll get the title. If not, you better ask somebody.

Before we purchased the house, we found out that the front stairs were dangerous and should not be used. I wasn’t lying when I said that caution tape had been put around them. They were an obvious assault on our eyes, and now it was clear that they could also inflict pain to the rest of our bodies.

I failed to get a good before photo of the stairs before the work was done.  But don’t despair. I have this fabulous artist’s rendering that portrays quite accurately the previously horrifying condition of the stairs.

artist rendering of front steps

The artist’s identity still remains a mystery. Like many other great works of art, you can see evidence that a previous work was lying under this masterpiece. Picasso was known to not only have painted over his own works but also the works of other artists.

This was beyond our capability as DIYers, so we relied on Jason Swafford of New Vintage Construction to do all of the work on the stairs. Rusted metal was removed, sections were rebuilt, and supports were added so that we could walk safely into our money pit.

Yes – the following images are after photos. Now I understand that they are unsightly, but at the time, they looked beautiful to me!

The stairs and railings have since been painted black. A bit more pleasing to the eye. In honor of Rogue, a black Cocker Spaniel adorns our steps. It’s also a little nod to a downtown Frederick tradition. 

My dream is to eventually get rid of the brick and existing railings. I’m obsessed with NYC brownstones and would love to replicate one of these beauties. I just don’t have the budget right now, nor do I have the patience to fight with the historic district!

A girl can dream! And until that dream becomes a reality, she will make endless trips to NYC to get even more inspiration and shoes. 


You’ve got to go through Hell…

Here’s a little peek inside the money pit. Most people would have shut the door as quickly as they had opened it on this place. To me, it was a diamond in the rough, and I could see its sparkle and brilliance, even in this state. 

I cannot wait to share the before and afters for each of these rooms. 

But for now, enjoy this walk down memory lane with me.

If you are wondering, that is a sensory deprivation tank. 

As I mentioned, I am republishing this blog. It has been nine years and some of these rooms have been redone more than once. I’m sure a few will undergo a few more updates in the next few years.