My last post was about my family working on our little nest through a 4th of July weekend nine years ago. Some things never change…This past 4th of July, my father was at it again. This time we were ticking off one more project in the living room.
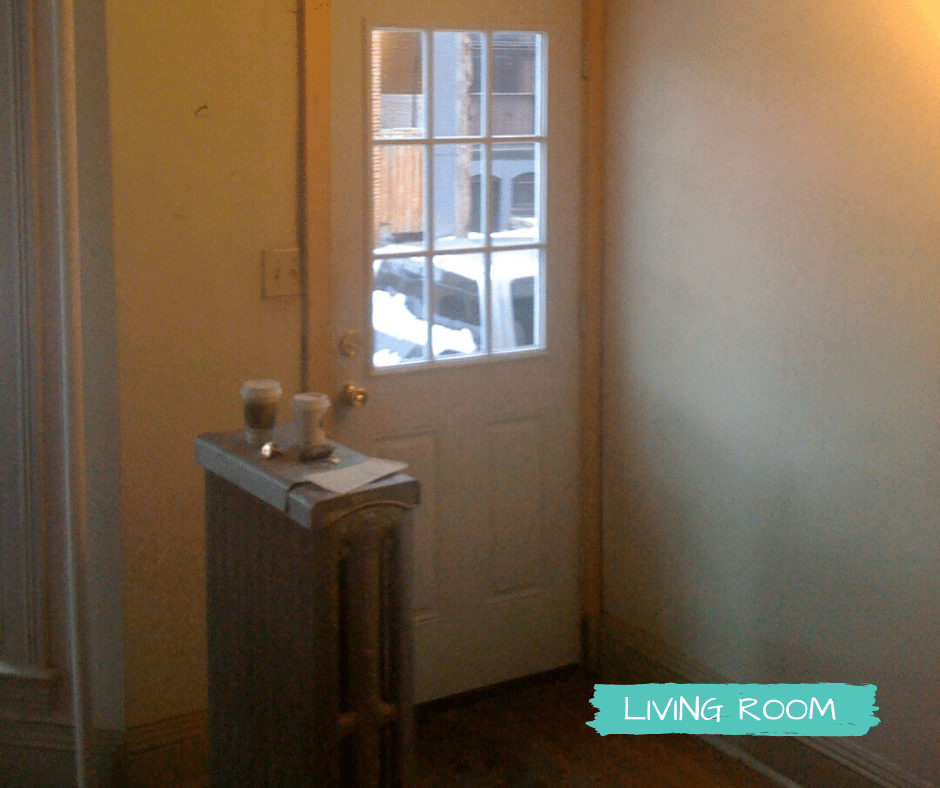
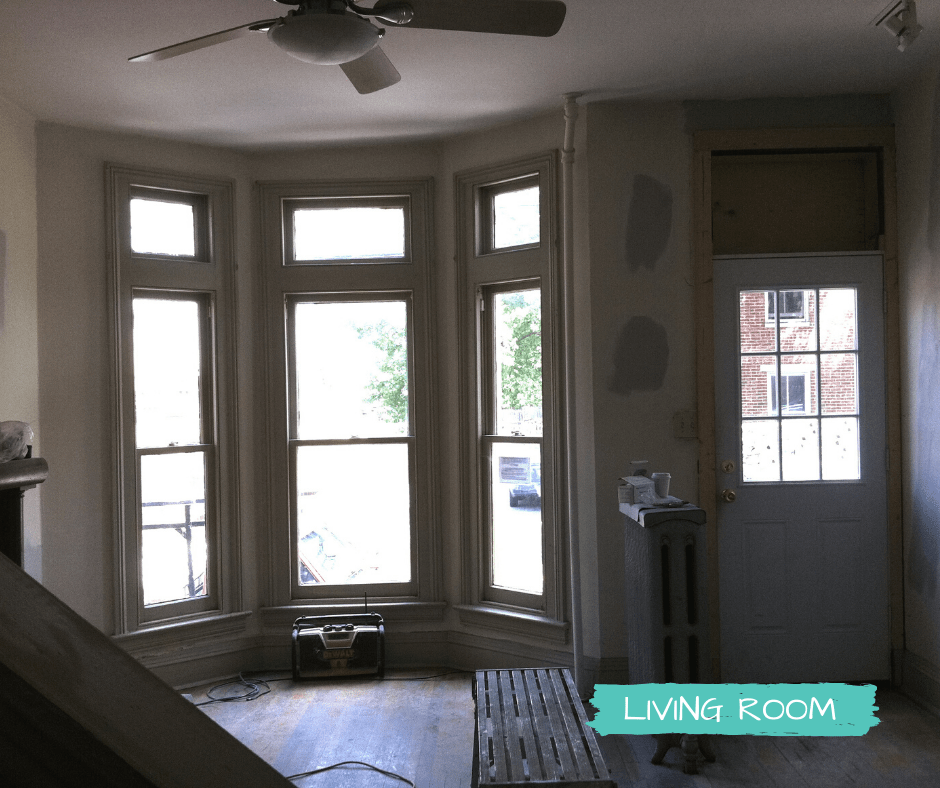
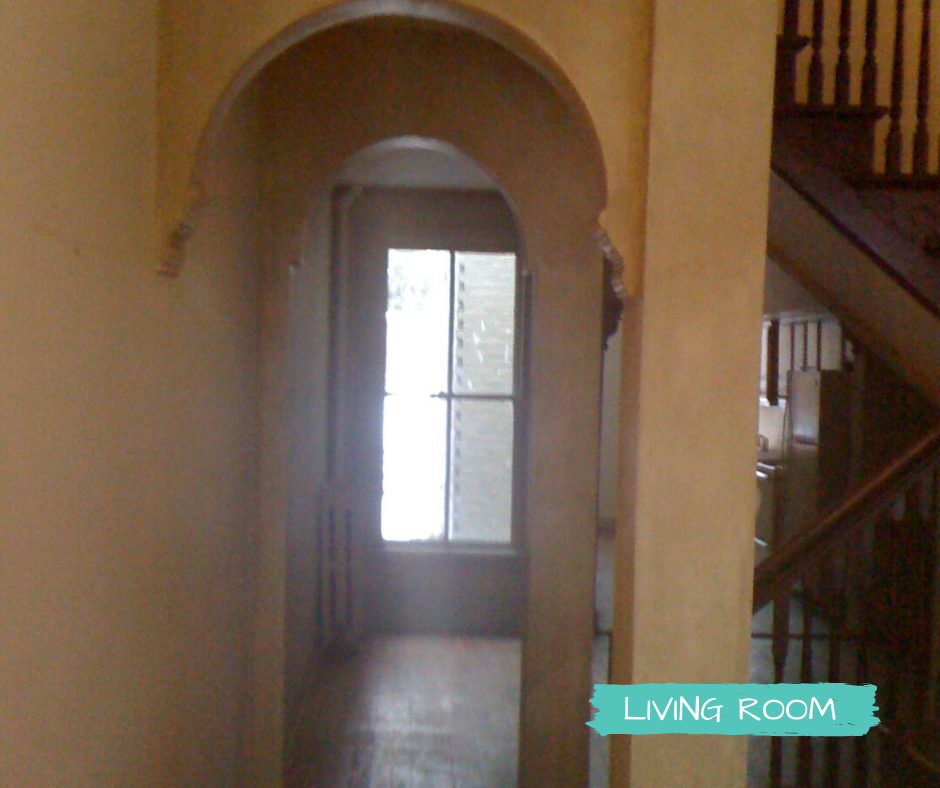
Over 100 years ago, if you had walked into our home, there would have been a wall to your left with just an opening to enter this first room. When we purchased the house, this wall was gone. When you opened that front door, it felt like you were walking right into the living room. It didn’t have a sense of an entry. Here are a few before pics.
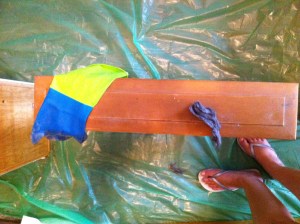
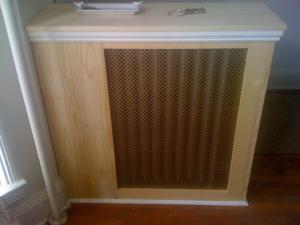
My father made a radiator cover that helped a bit and created a little more separation here.
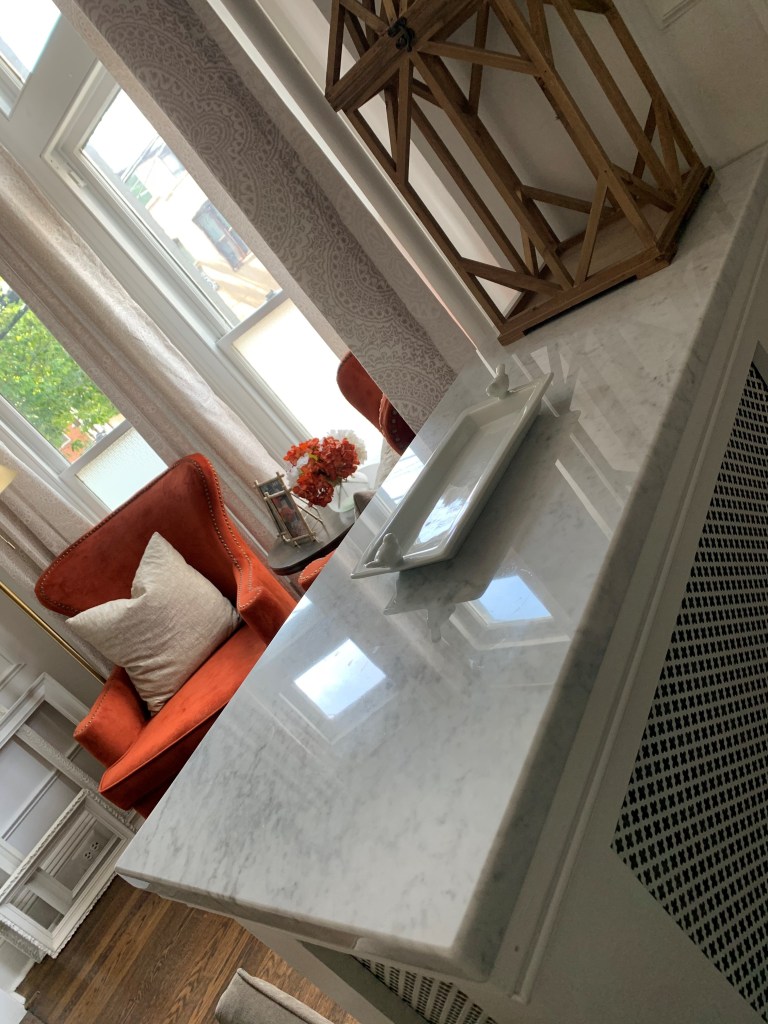
We even gave this cover a little update a month ago with a beautiful marble top.
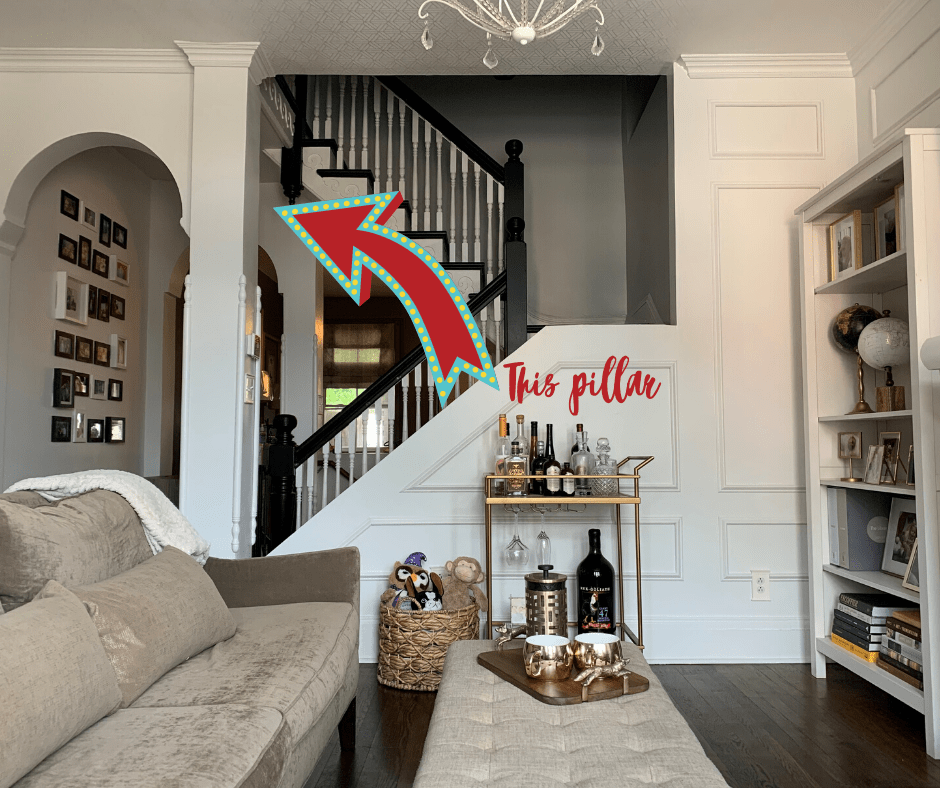
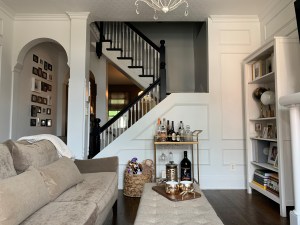
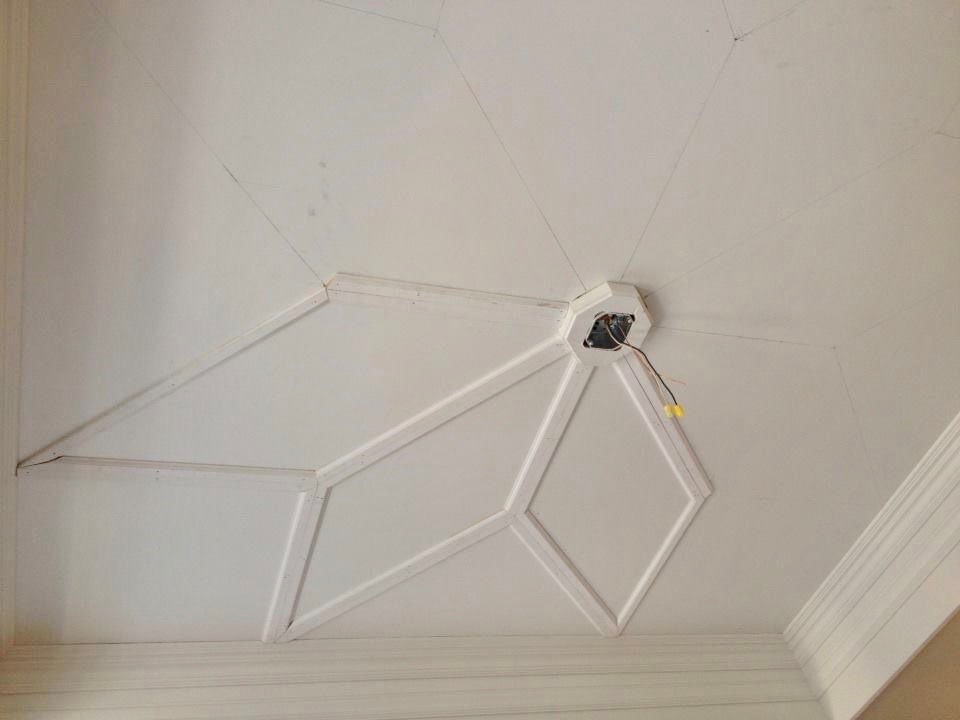
Gorgeous, but you still felt like you were walking right into the room. I didn’t want to put a wall back up because this isn’t a large room and I didn’t want it to feel even smaller. Solution – a pillar. My father created a pillar mirroring the pillar directly across the room at the base of the stairwell.
So here’s a progress pic…
And now for the final product.
Now It feels more like an entry. My father even added the final bits of applied moulding to the wall next to the door.
Some things never change, I’ve got one 2 more projects for this teeny tiny entryway. I’ll share them on this blog if they ever come to fruition. Maybe next 4th of July : )
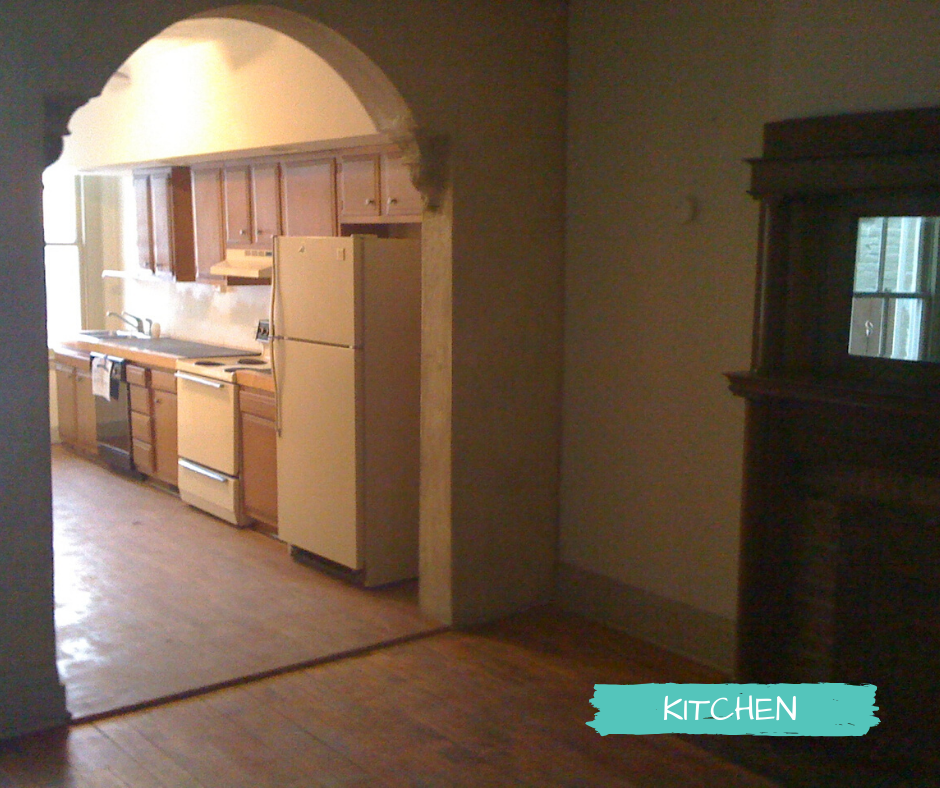
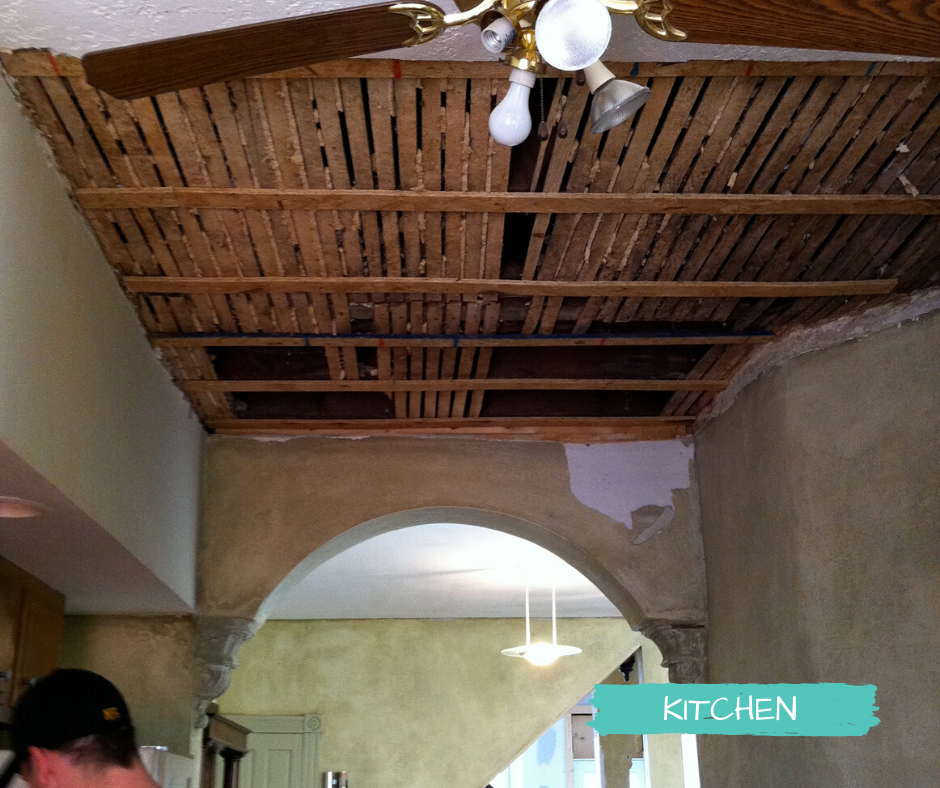
For this week’s post, we are sharing the work we did in the kitchen. I thought that by now I’d be sharing a kitchen that looked much different. In fact, one week before the COVID-19 lock-down, we had contractors in our home and working up quotes for a complete gut and remodel. We thought that we would have an entirely new kitchen by August. At this point, our dream of a new kitchen this year is slowly burning down in the dumpster fire that is 2020. Here’s to 2021!
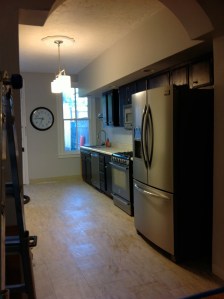
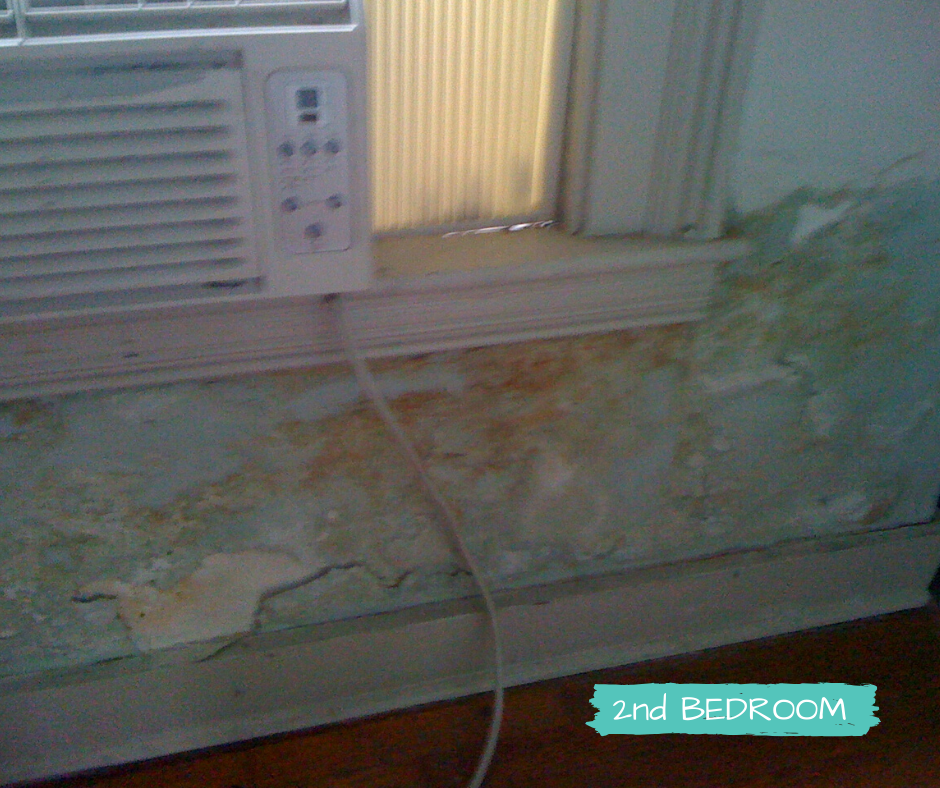
Let’s start out like we always do, with some very blurry, poorly lit before photos.
And here’s my blog post from 9 years ago…
This past weekend saw a flurry of activity at the money pit! I think there may have been 20+ people crammed in our house at one point on Saturday!!
On Friday evening, my father and I did a walkthrough and started to create a punch list of “things to be done.” This list is HUGE. The list grew on Saturday morning when he went through the house once more with Jeffrey.
After a quick trip to Lowes and Home Depot, we realized that we were going to do a down and dirty (emphasis on the dirty) remodel to the kitchen. So we purchased a cheap countertop that I find not completely offensive, a sink, a faucet, and other stuff that I can’t identify. Appliances were also arriving that afternoon and we had a LOT to do.
Jeff’s parents, Jim and Sheila, arrived and along with Jeff and my father and mother, they quickly got to work. Work that is difficult, dirty, and sadly, goes unnoticed. Cleaning, running new dedicated lines of electricity, and reworking some very old plumbing.
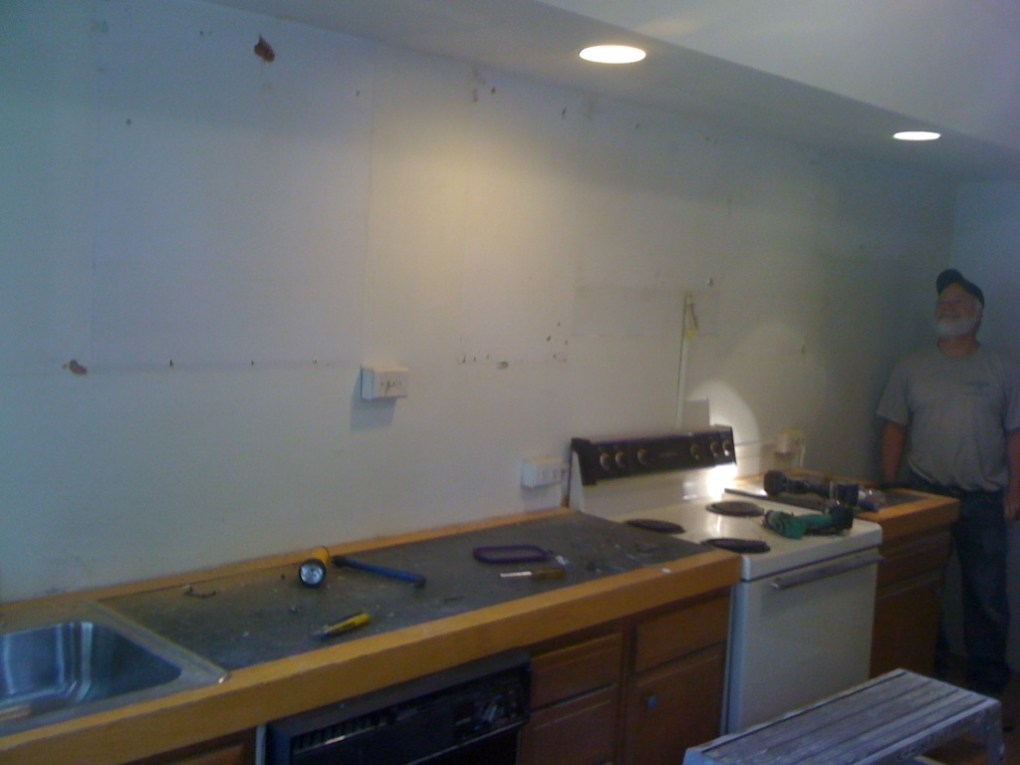
By 10:30 that morning so much progress had already been made.
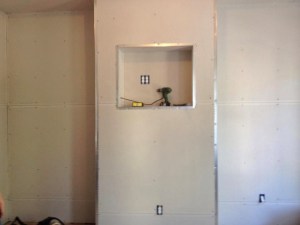
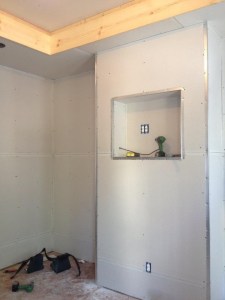
With cabinets getting removed, it was time to tackle the countertop. For months we have speculated about what in the heck the countertop was made of…we never did come up with a viable answer, but one thing was certain – it needed to go!!
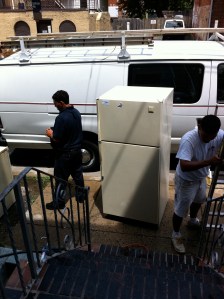
Next to go were the appliances. There are no words to describe that that old refrigerator smelled like, but there is a giphy that accurately represents my reaction when I first opened that door…
Out with the old, in with the new!
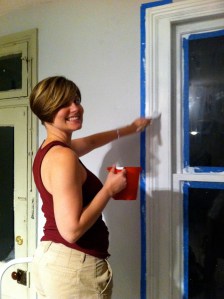
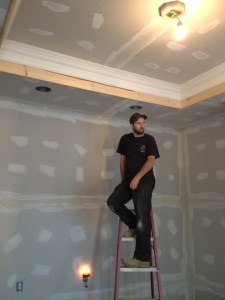
Jeff and I spent the remainder of the week painting the walls, the trim and the refinishing the cabinets.
It was really starting to look decent in there.
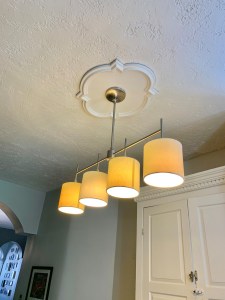
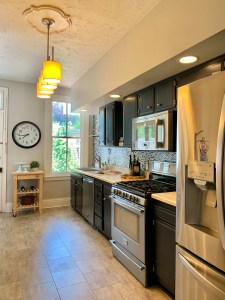
My parents were back in town over the 4th of July holiday weekend and we all spent the weekend, including the 4th working our butts off. New flooring, new lighting and more cleaning. We did a peel and stick floor tile to save a bunch of money, but I did splurge a little on a ceiling medallion and light fixtures. Not our dream kitchen, but it would do for now.
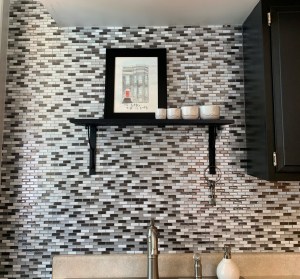
So that was exactly 9 years ago this weekend and not much has changed. We have new fridge and a few years ago, I was on the peel and stick tile train and did a backsplash. Not too shabby for $250 and 3 hours of work. It turned out quite well.
I hope that I’ll be writing a blog about our new kitchen sooner than later. For now, visions of double ovens and pot fillers will keep dancing in my head until they can be installed. I won’t stop believing that this project will actually happen.
We are moving into the living room for this post. Once again, let’s take a look back at what we were working with.
It wasn’t a total disaster in here, so the work was much more cosmetic. I really wanted to keep this room all white, but add interest and texture through architectural details.
Starting at the entry, we replaced the front door. It’s a very basic door. The one I really want is about $2,000 over the budget, so we’ve just gone with something simple from Lowe’s.
We also added new trim around the frame of the front door. The glass was missing above the door and our goal is to replace it with a stained glass piece. Just haven’t found the right one yet.
Next up, the radiator that greets you as you enter this room. It was necessary, but not nice to look at. In just a few days, Jeff and my father built a cover that fits like a glove. It also made this area feel more like an entry.
Just 2 weeks ago, we made a long-awaited update to this radiator cover, a marble top. Only 2 days after a quick trip to A & S Tile to select the piece, it was ready and installed. I LOVE it! We are not done with this area yet. We’ve got more plans and will share them once they come to life.
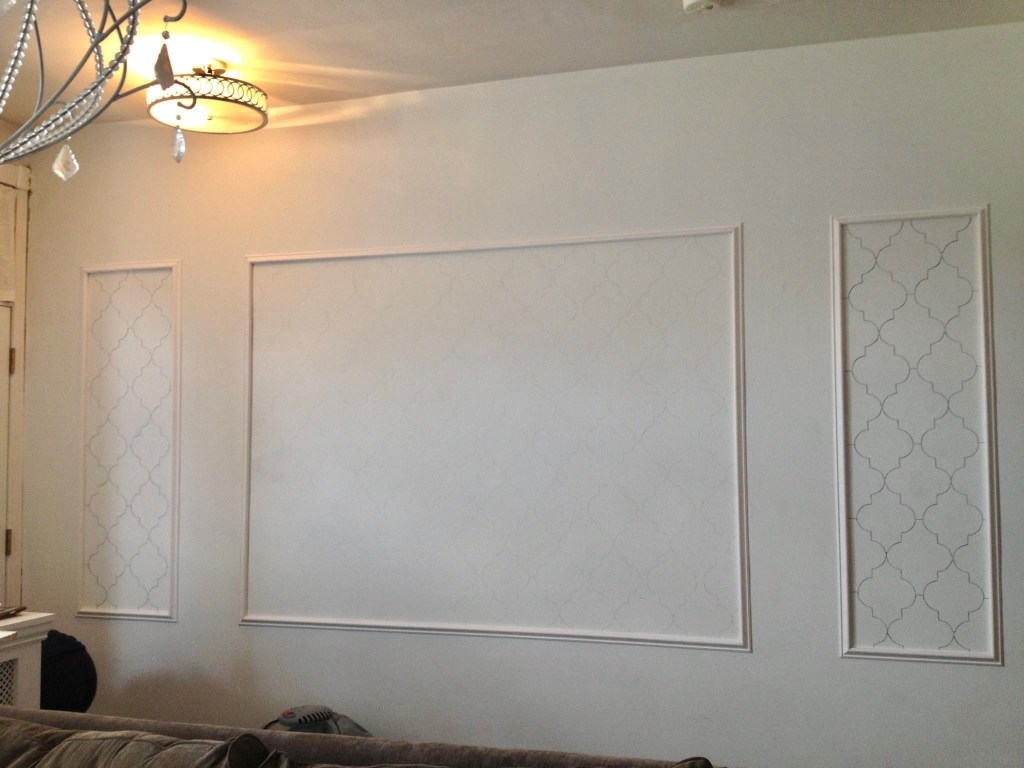
Earlier I mentioned that I wanted to add texture to this room. We did this in a few different ways. First, to add texture, we added applied moldings to all of the walls. What a difference this made.
For a hot second, I was going to do a stencil inside each panel. I did a few and hated it. It was just too trendy and it pulled the focus away from the moldings themselves.
Applied moldings just add so much sophistication to this room. Lord knows it’s occupants don’t ; )
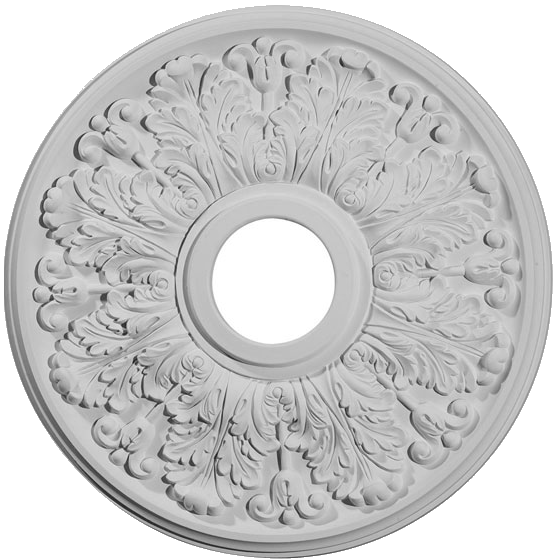
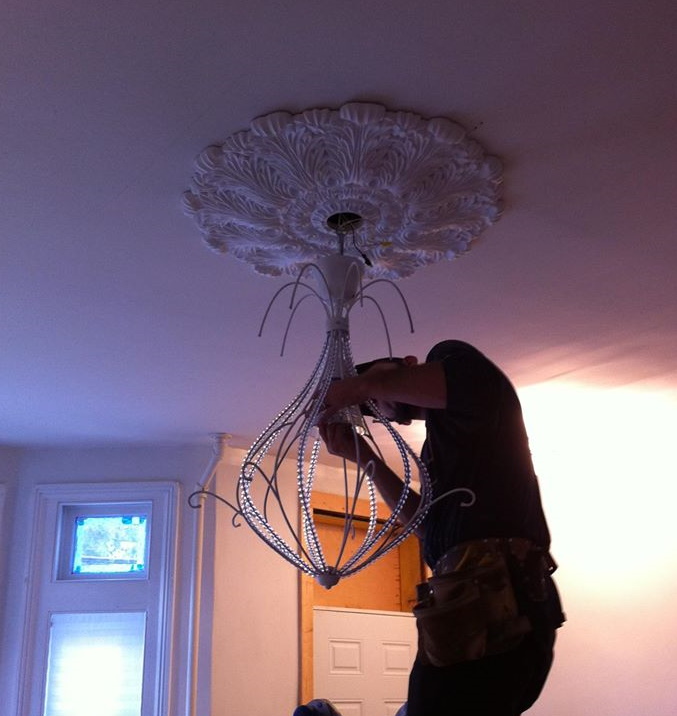
A second architectural element we added was a decorative ceiling medallion. I found this great one at Architectural Depot. I had a black chandelier from IKEA that we simply spray painted white. The medallion really helped elevate this light fixture and it was much cheaper than purchasing a new chandelier.
That’s not the only thing we did to the ceiling. In interior design, the ceiling is often referred to as the 5th wall and it shouldn’t be ignored. In our master bedroom, we painted the ceiling the same color as the walls to draw the eye up and to make the white tray stand out even more.
In this room, we went with wallpaper. Yup – I wallpapered the ceiling. Well, I didn’t do the actual work – I just picked out the paper! Thibault came through again. Because I saved money on the lighting, I was able to spend a little more on this fabulous paper.
The floors were in surprisingly good shape with the exception of just a few minor spots. We had them refinished and stained several shades darker. We had arranged for them to be done while we were on a trip to Paris. Four hours before we left for the airport, we got the couch stuck in the stairwell trying to move it. Seriously…
We have since figured out that by simply putting the couch on it’s end, it moves seamlessly between rooms.
I never wanted to leave Paris, but we came home to these GORGEOUS floors. They made being home from vacation a little easier.
If you take a close look at that photo, you’ll see that I may have been going through an “owl phase.” There are 9 owls on that mantel. When I do something, I really do it. Sometimes that’s not such a good thing. I’m now over the owls.
At one point, I got bored with the white in here and I actually painted the entire room on a Friday afternoon. This only lasted 2 days. It was back to white before the weekend was over. (I used to have quite a lot of time on my hands…)
You’ll notice that the fireplace surround is brown in this photo. One quick, cheap project that changed the look of the surround was adding peel and stick tile. One day, I’ll spring for marble. Until then, this will have to do. When I did this peel and stick tile was a new product. You can find it everywhere now and it’s a great money saver and super easy to install.
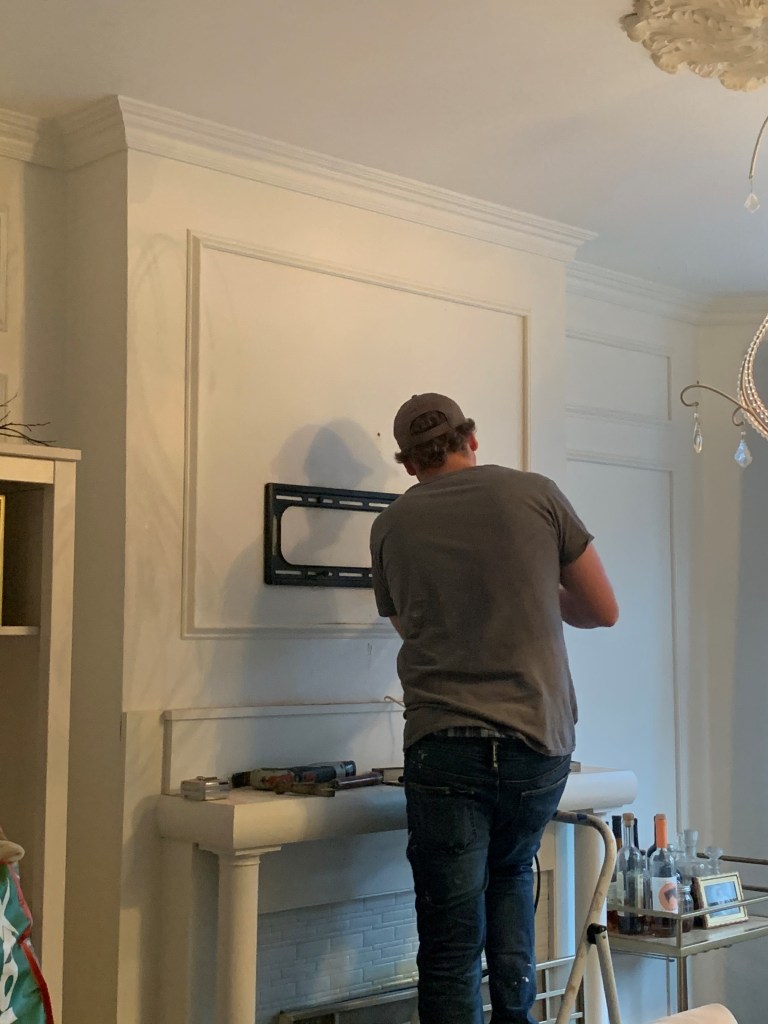
We recently did something that I swore would never do in this room, but I am apparently the Queen of Never Say Never.
That’s Jeff installing the mounting for a TV to go over the fireplace.
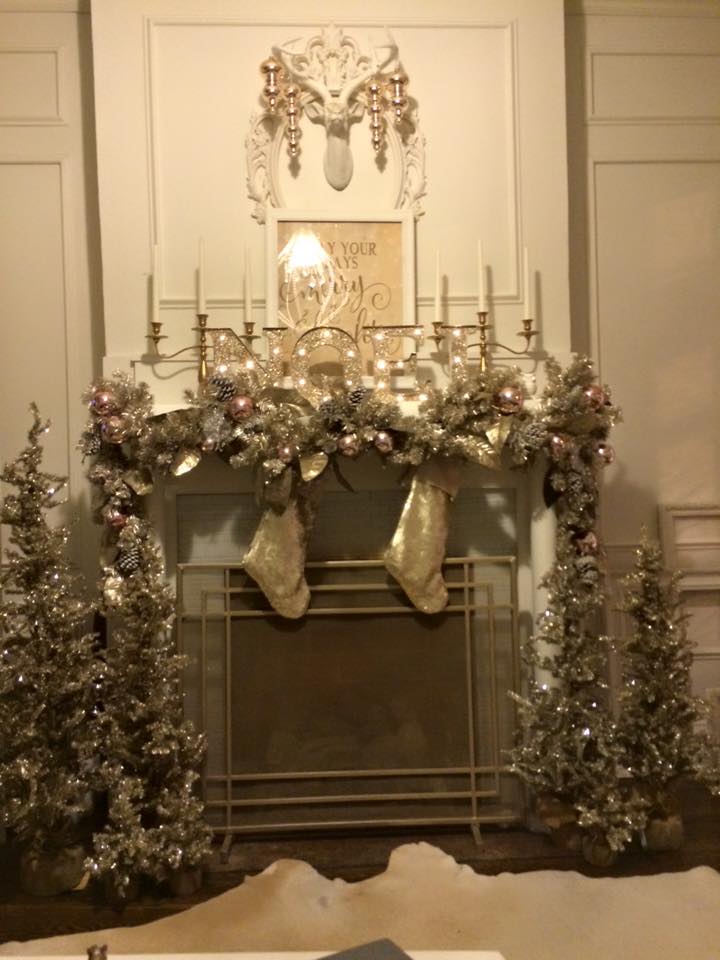
When I told my mother what was happening, she said aloud the words I hadn’t yet been able to utter, “What about Christmas?” Yes. Christmas. I go a little crazy at Christmas and I love decorating this mantel.
I guess I’m going to need to get a little creative this Christmas. I’m thinking about just wrapping it up like a big present. I’m sure Jeff would love that!
So here’s what this room looks like today. The owls are gone, but baskets of toys keep popping up. It is NEVER this clean and tidy, but it does fulfill its purpose. A whole lotta life happens in this living room.
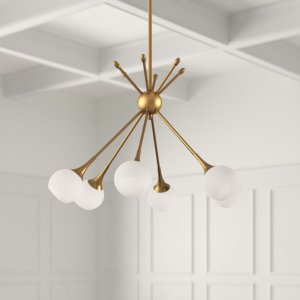
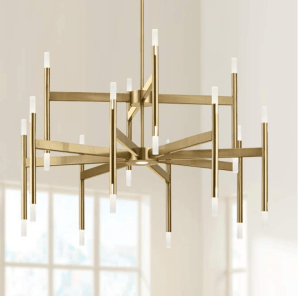
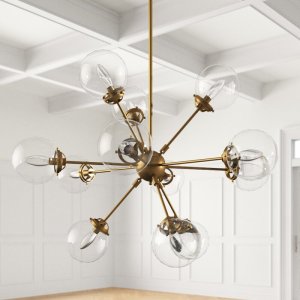
What’s next – I really do want a new chandelier. Here are a few I have my eye on.
We also plan to install a section of tile near the entryway. Something with marble to coordinate with the new radiator top. There’s talk of adding a pilar to the radiator cover as well. I know that my father is just dying to start yet another project and I don’t want let him down.
If any of these projects happen, I’ll be sure to share them with you all on this little blog.
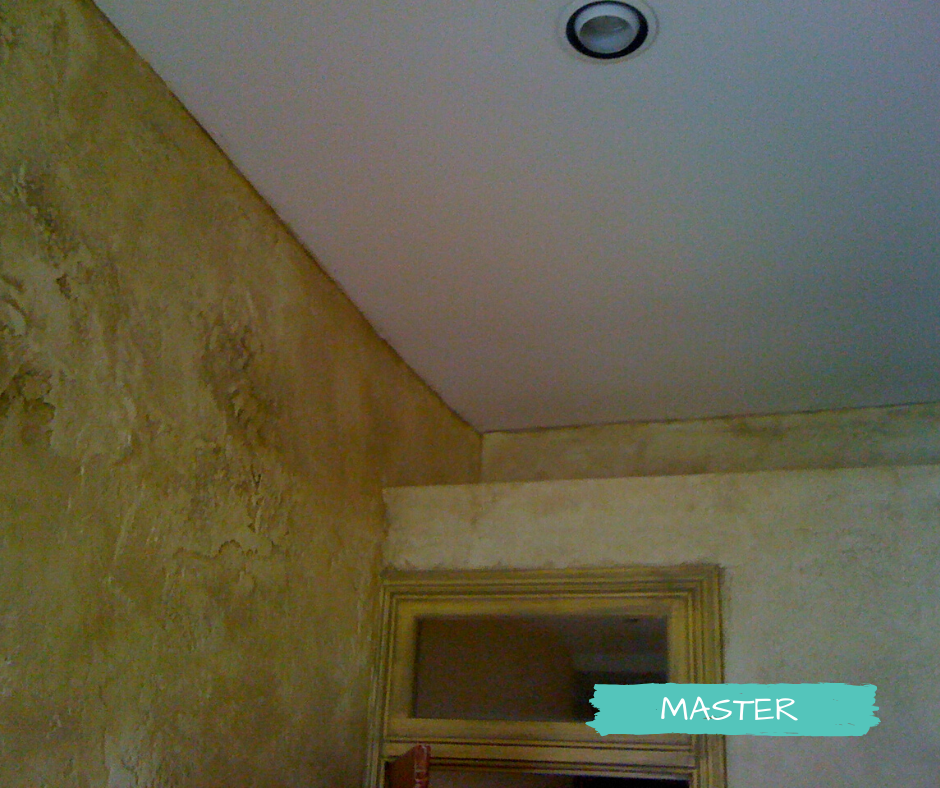
Our third and final room upstairs is the master bedroom. As I mentioned in an earlier post, it was 3 years after we purchased the house before we started work on this room. There was so much work to be done.
Plaster had been applied to all of the walls and painted in yellow, brown, and gray. Sorry for the terrible photos, but think Olive Garden late 90’s. That was the vibe in this room. I love breadsticks and endless bowls of salad as much as the next gal, but I certainly don’t need to be thinking about food when I’m trying to go to sleep.
I’m certain that I’m just standing there thinking about wallpaper in that picture : )
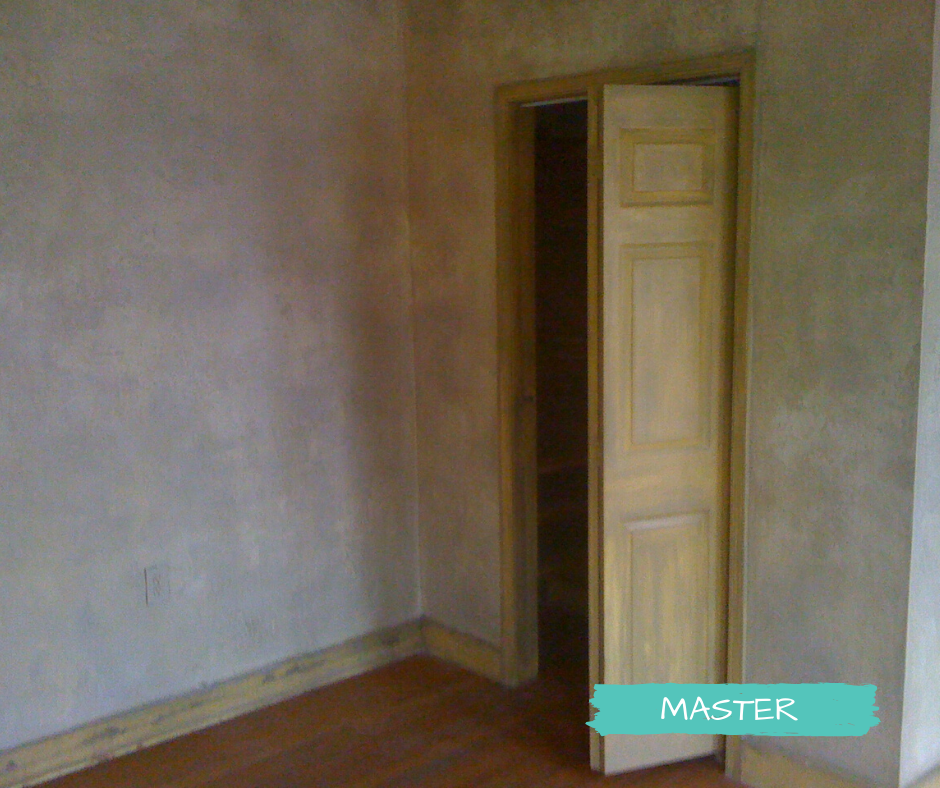
We had all of the plaster removed and that little closet in the corner was torn out as well. Removing the plaster was a horribly messy job and was done before we moved into the house. The room served as a storage/work area while other rooms were being remodeled.
It is a good thing that we waited to get started on this room as a heavy storm revealed that our roof wasn’t in the best condition. New roof = smaller budget for the bedroom.
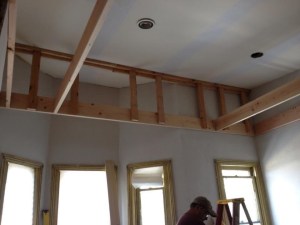
Fast forward 3 years and we were ready to get to it. You might have noticed that the ceiling was really high. While it was nice to have a vaulted ceiling, it was wasted space and there was no insulation in the room. We lowered the ceiling and added much-needed insulation.
The vaulted ceiling allowed for us to easily add a tray into the center. Knowing that due to my insomnia, I’d be spending hours on end looking up at this tray ceiling, I wanted to have something worth looking at. I came up with a design and my brother, Josh, brought it to life. I joke that if we move, I’m taking this ceiling with me. I’ll reveal the final design later in the blog.
As for the rest of the room, we removed the horsehair plaster, put up new drywall, and installed can lights. I really do love drywall. If you live in a historic row home, you know the struggle of attempting to hang a simple picture with a nail on a plaster wall.
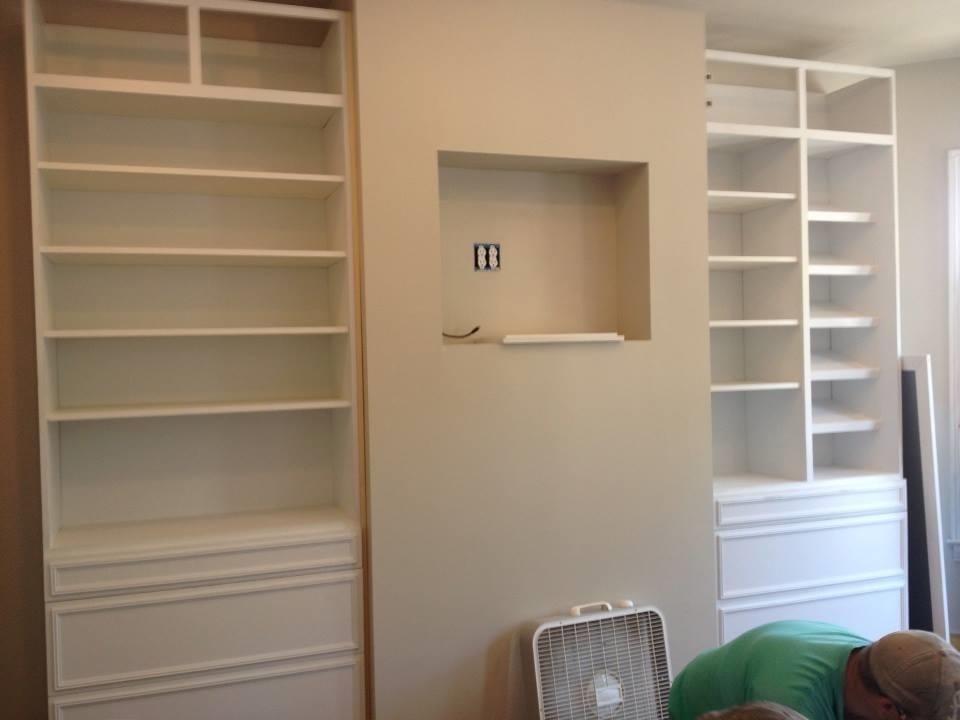
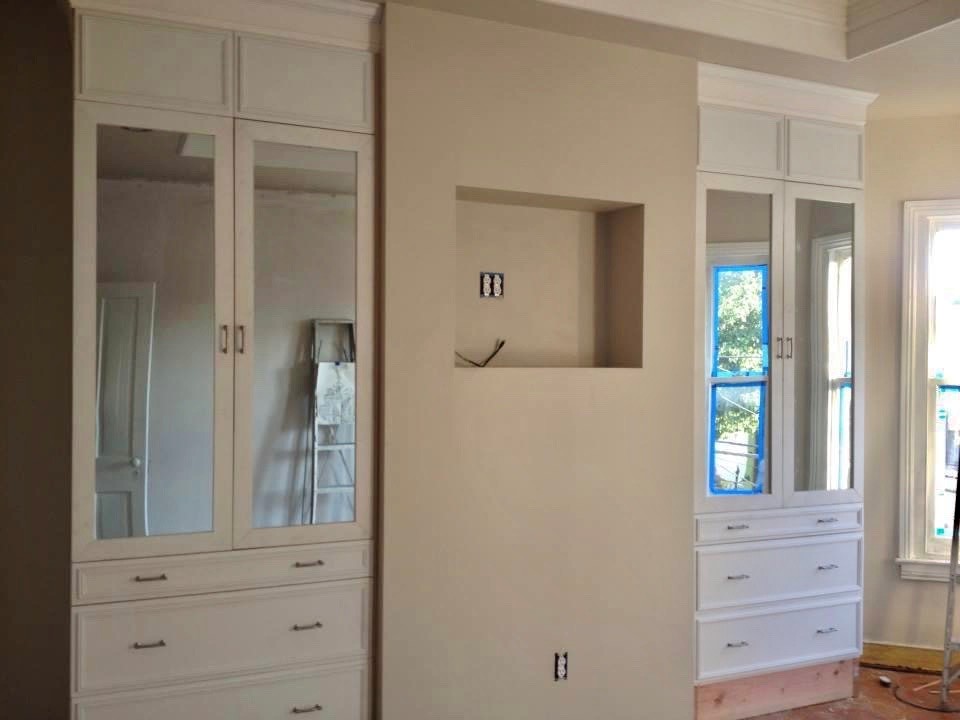
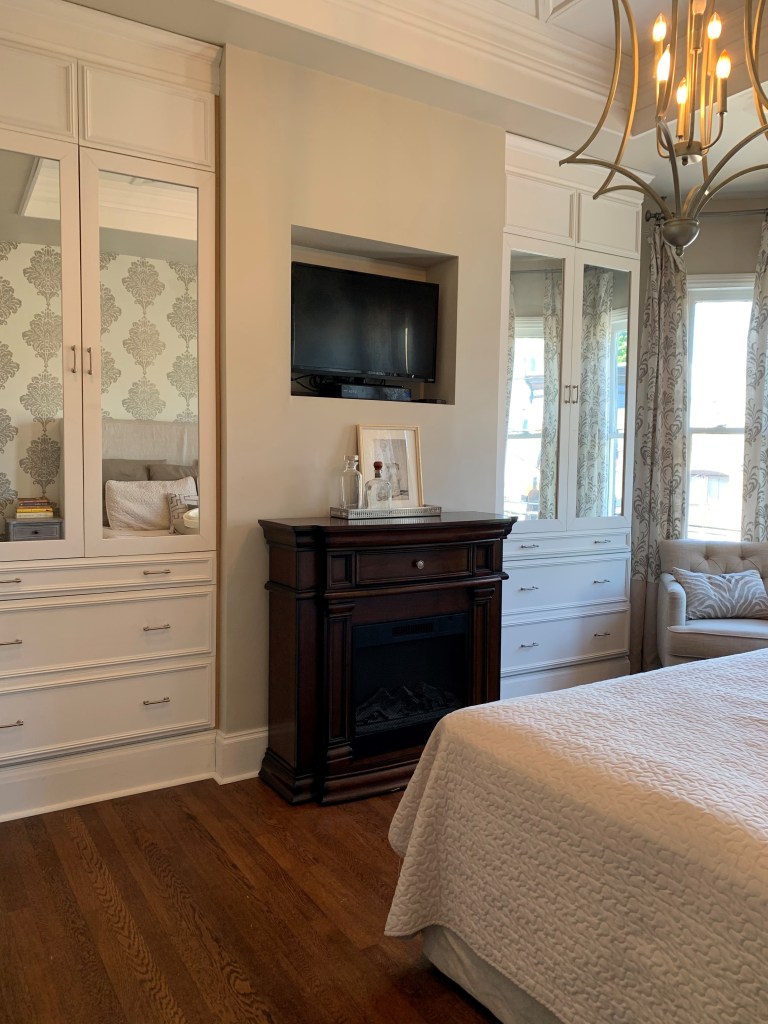
Like most older homes, this one came with little to no storage and we had ripped out the two tiny closets that were here. My father built these custom built-ins for the master bedroom and they are just about perfect.
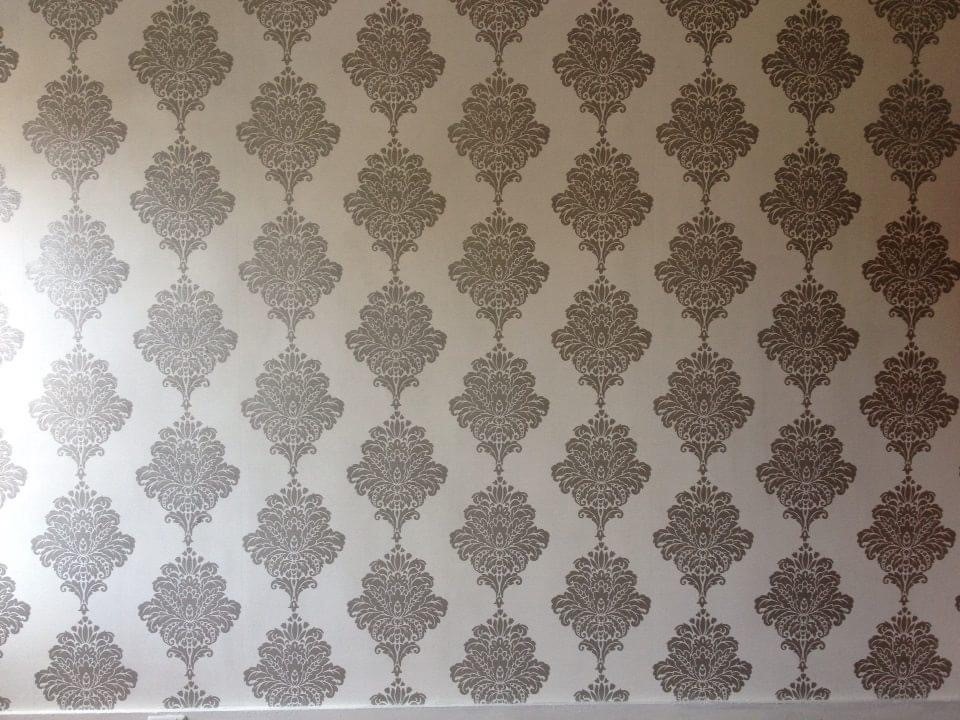
One last touch to this room was wallpaper. You can’t go wrong with damask. This print has a shine to it that instantly caught my eye. I’ve always been a fan of Thibault Wallpaper. Their prints are classic with just the right touch of modern. This one is Arturo Damask in Metallic Silver from the Monterey Collection.
For the rest of the walls, we went with Dove’s Cry by Valspar. This is one of those perfect colors that can go tan or grey depending on the room and the light. Plus, how perfect is that name??
Now for some after photos.
I know I’m a broken record when it comes to having big ideas and a small budget, but I truly believe that you can bring your vision to life without breaking the bank. Here’s how I saved a bunch of money in this room.
The wallpaper. I only did an accent wall. This saved on the cost of materials and labor.
The bed – I picked up our headboard at a Restoration Hardware outlet. I saved 60% off the retail price.
Those little nightstands – I found them at Gabe’s of all places. Don’t sleep on places like Gabe’s – you can find some great, cheap things there.
The comfy corner chair and the accent pillows – HomeGoods finds.
Euro shams and sheets are from IKEA.
Curtains – I desperately wanted to have curtains custom made in the material that matched the wallpaper, but that wasn’t going to happen. I found these at TJMaxx, they went really well with the wallpaper, but they were too short. I purchased a few yards of linen fabric that matched the headboard and added it to the bottom.
My sweet dreams are coming true as we renovate this home. Next week, we will move to the main living area that is still work in progress and more fodder for my dreams.
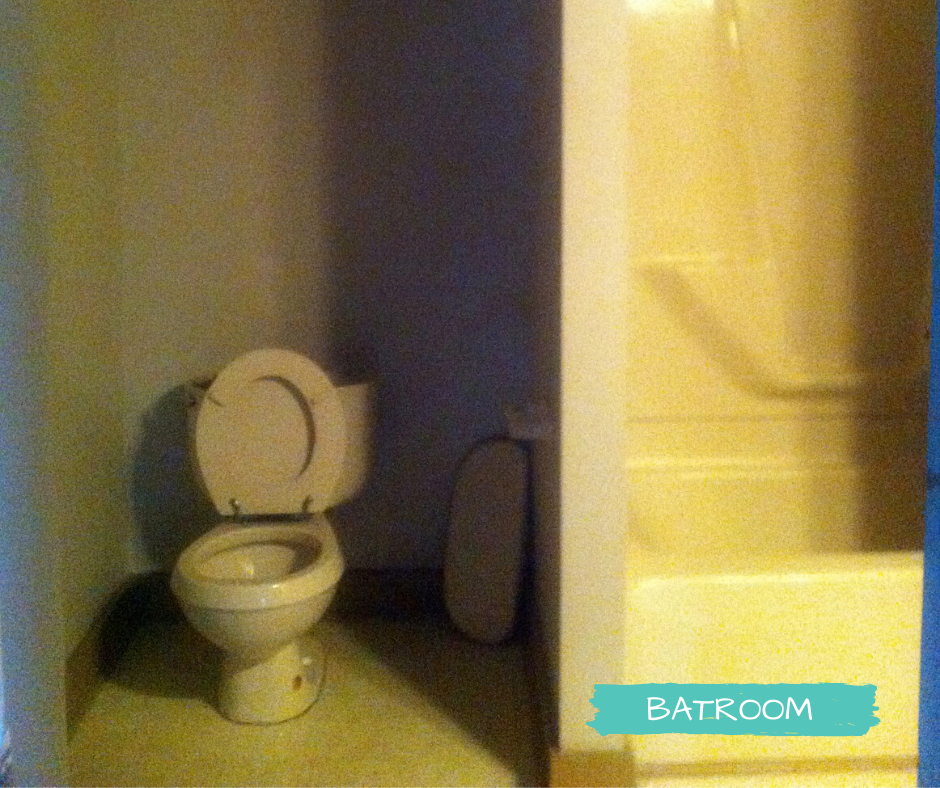
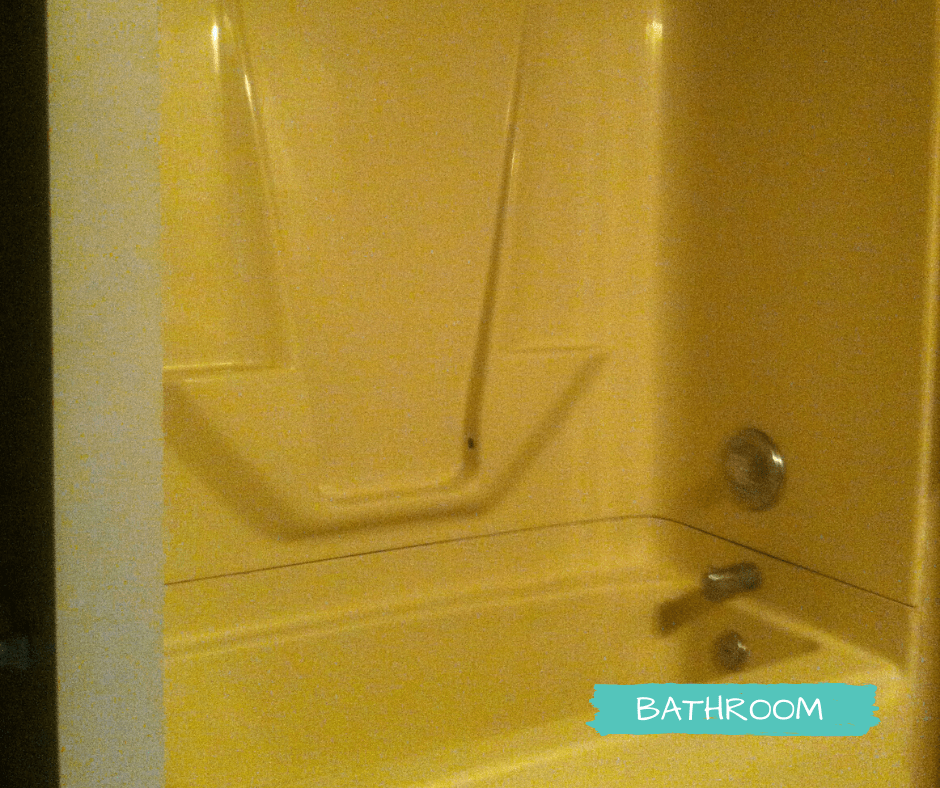
Last week you saw the before of our bathroom. If you happened to miss it, you can check it out here.
This week, we are sharing the after. Actually, the after, after. Let me explain. I’ve mentioned before that I’m bringing an old blog back to life. As a result of not keeping up with that old blog and not thinking I’d ever bring it back, I don’t have a single picture of the bathroom after it was completed in 2011. I do have some of my old design notes that I can share.
I had some pretty bold plans for that little bathroom. As usual, all of them over budget and just a bit eccentric. Here were our final selections.
For the paint, we went with Martha Stewart’s Precious Metals in Eagle Brown. Terrible name, but beautiful color. Her precious metals collection had a gorgeous shimmer – not glitter – shimmer – we were trying to keep it classy. It was a perfect compliment to my tiny bubbles in the shower.
For fixtures, we went with the Bamboo collection from Glacier Bay in brushed nickel. Clearly, Don Ho had a bigger influence on me than I thought. We wanted double sinks, but we had very little room. Leave it to IKEA to have a solution. Their BRÅVIKEN sink’s trough-like design allows for two faucets in a smaller space. We went with one large round mirror to “mirror” the accent tiles in the shower. We kept the light fixtures clean and simple.
While I don’t have an after photo, what I do have is hindsight and photos of a slightly updated bathroom.
Let’s tackle that hindsight.
The paint. That paint really was fabulous but it made that bathroom feel so small and dark. I was going for a spa look but got a cave instead. Great for hibernating, terrible for getting ready in the morning. The paint’s saving grace was the shimmer. It did reflect light nicely. But that shimmer was a blessing and a curse. It was a nightmare to do a touch-up with that paint. It NEVER looked right. We had to repaint an entire wall, not just the tiny bit that was nicked. On a trip to Home Depot to get more of it, I found out that the entire line was discontinued. Time for a new color and no shimmer!
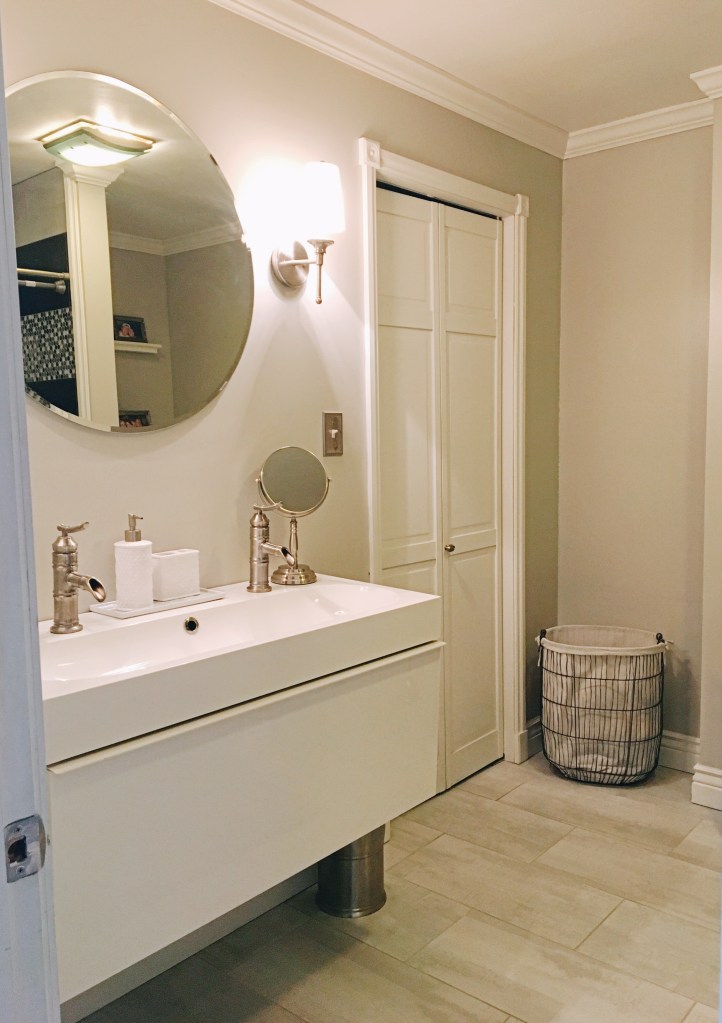
The sink. It works and it gives us two faucets. What it doesn’t do is provide space for anything more than a toothbrush holder, a soap dispenser, and a small mirror. I am a big fan of a clean, clutter-free countertop, but getting ready is a real pain in the ass. I have to put everything in the sink basin. Countless little hairpins have gone down the drain and I am convinced that I’m going to be electrocuted by the hairdryer. Because it has no legs and is mounted to the wall, I live in fear that it will just pop off the wall and onto myself or Brant and crush us.
The heated floor. I’m as stubborn as they come and when the salesman told me that I would never use that heated floor, I vowed to prove him wrong. It’s been 9 years and we have probably used it less than 20 times. The only time it has really been useful is after a long night of drinking and karaoke when sleeping on the bathroom floor just feels like the right choice.
So now for the update. It’s a good thing that paint was discontinued. Gave me a reason to find a new color. I went with my favorite – GRAY!
The paint really made the bathroom feel much bigger and so much brighter. Not to mention, so much easier to touch up when needed.
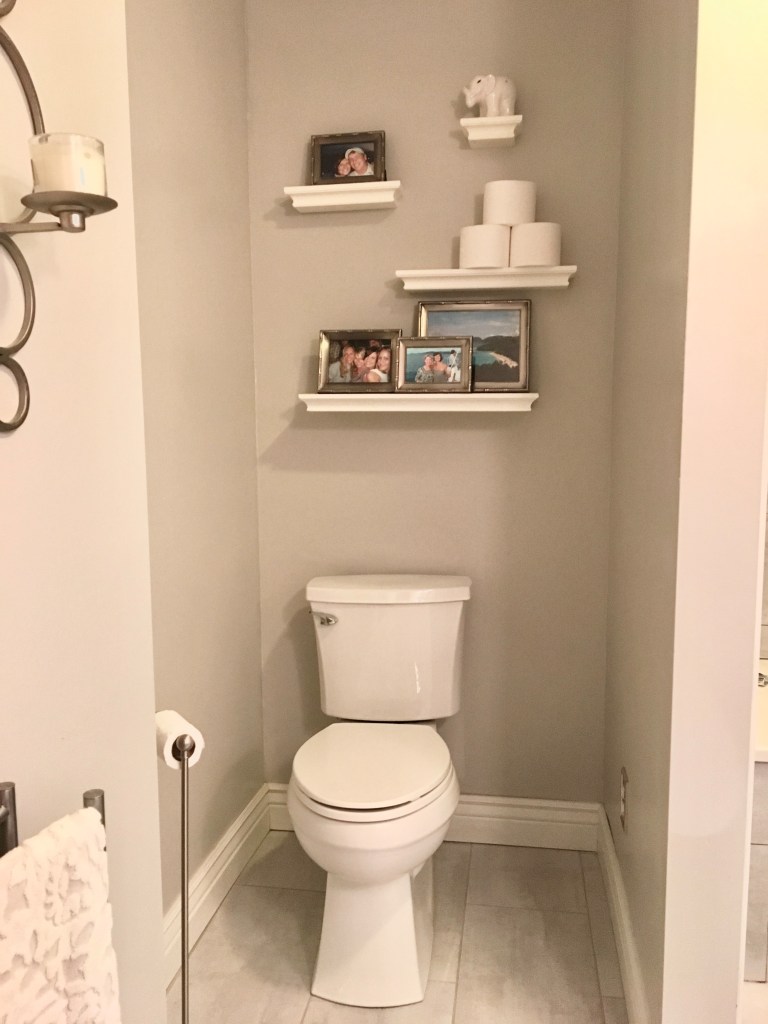
Don’t think that I’m done in here. I want a new vanity that doesn’t threaten to kill me and I would love glass doors for the shower. I also hate that toilet. Check back in a year – I might have another bathroom update. OR my husband, not the vanity, will have killed me by then.
Like what you see? Shop this look. While many of the items in my bathroom have been discontinued, I’ve found a few great substitutions.
If you are like me and are still in love with NKOTB…you’ll get the title. If not, you better ask somebody.
Before we purchased the house, we found out that the front stairs were dangerous and should not be used. I wasn’t lying when I said that caution tape had been put around them. They were an obvious assault on our eyes, and now it was clear that they could also inflict pain to the rest of our bodies.
I failed to get a good before photo of the stairs before the work was done. But don’t despair. I have this fabulous artist’s rendering that portrays quite accurately the previously horrifying condition of the stairs.
The artist’s identity still remains a mystery. Like many other great works of art, you can see evidence that a previous work was lying under this masterpiece. Picasso was known to not only have painted over his own works but also the works of other artists.
This was beyond our capability as DIYers, so we relied on Jason Swafford of New Vintage Construction to do all of the work on the stairs. Rusted metal was removed, sections were rebuilt, and supports were added so that we could walk safely into our money pit.
Yes – the following images are after photos. Now I understand that they are unsightly, but at the time, they looked beautiful to me!
The stairs and railings have since been painted black. A bit more pleasing to the eye. In honor of Rogue, a black Cocker Spaniel adorns our steps. It’s also a little nod to a downtown Frederick tradition.
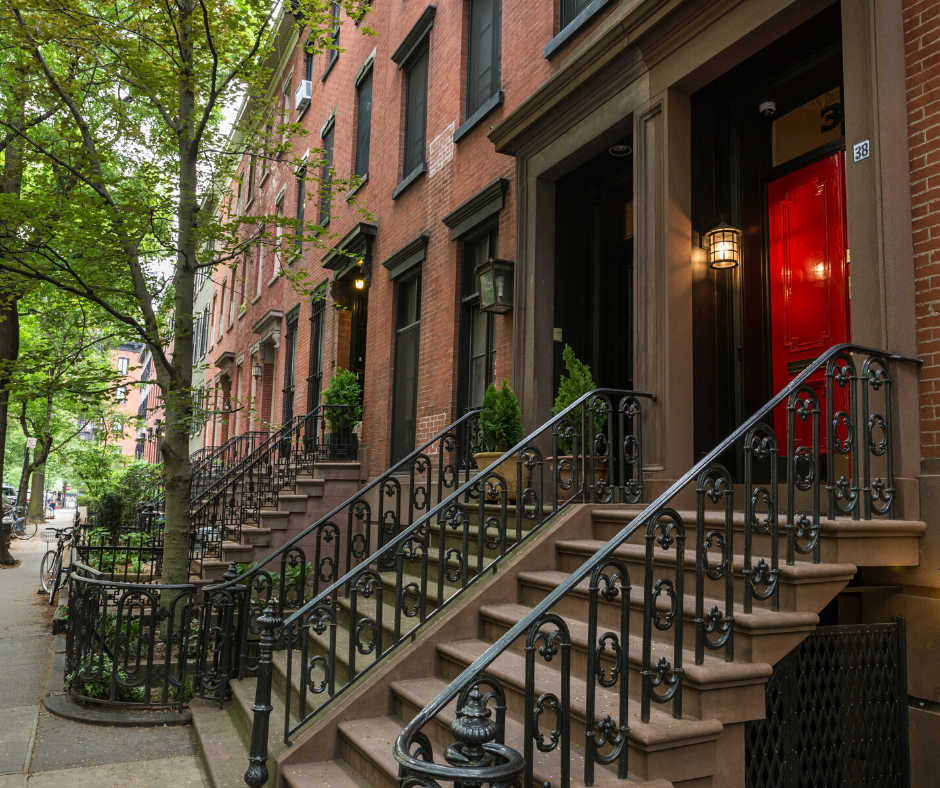
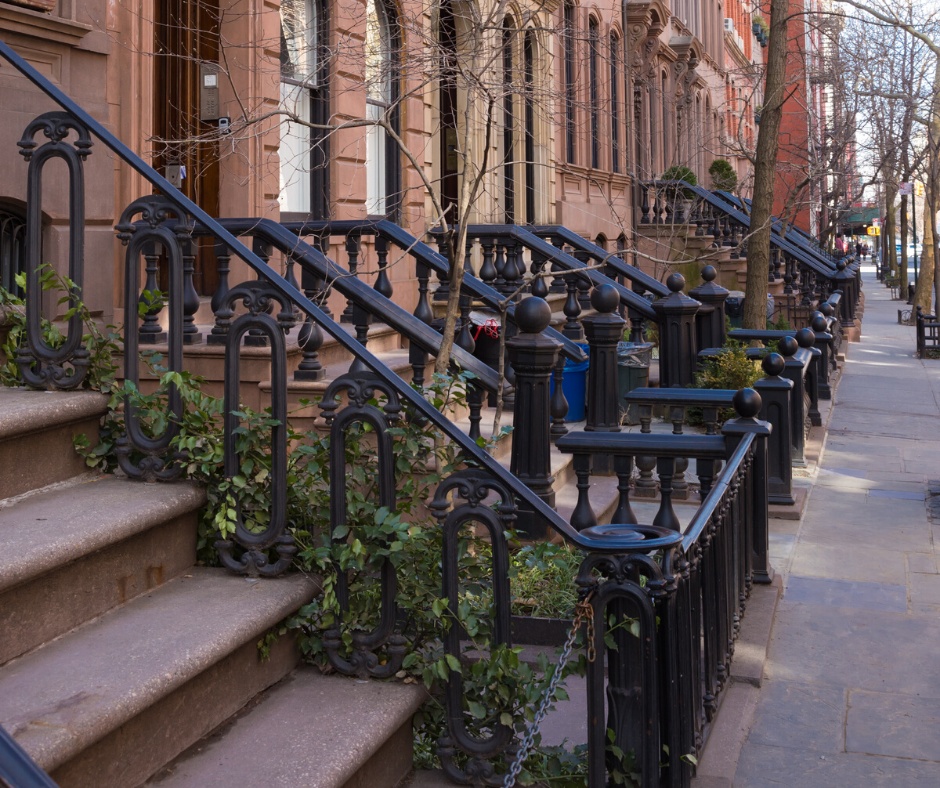
My dream is to eventually get rid of the brick and existing railings. I’m obsessed with NYC brownstones and would love to replicate one of these beauties. I just don’t have the budget right now, nor do I have the patience to fight with the historic district!
A girl can dream! And until that dream becomes a reality, she will make endless trips to NYC to get even more inspiration and shoes.
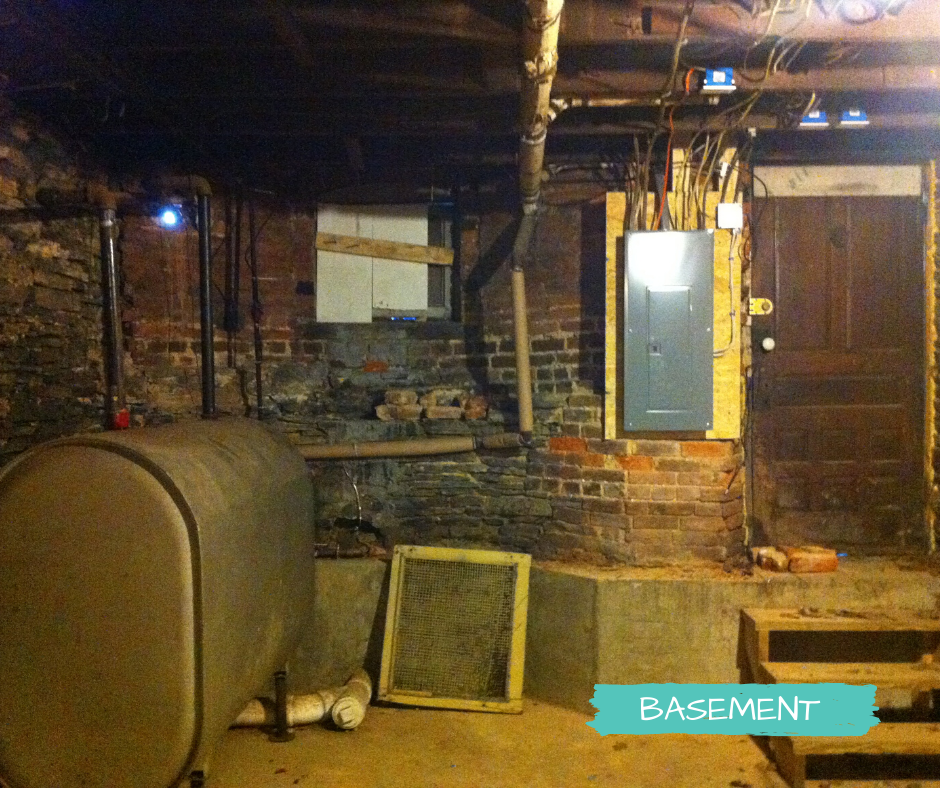
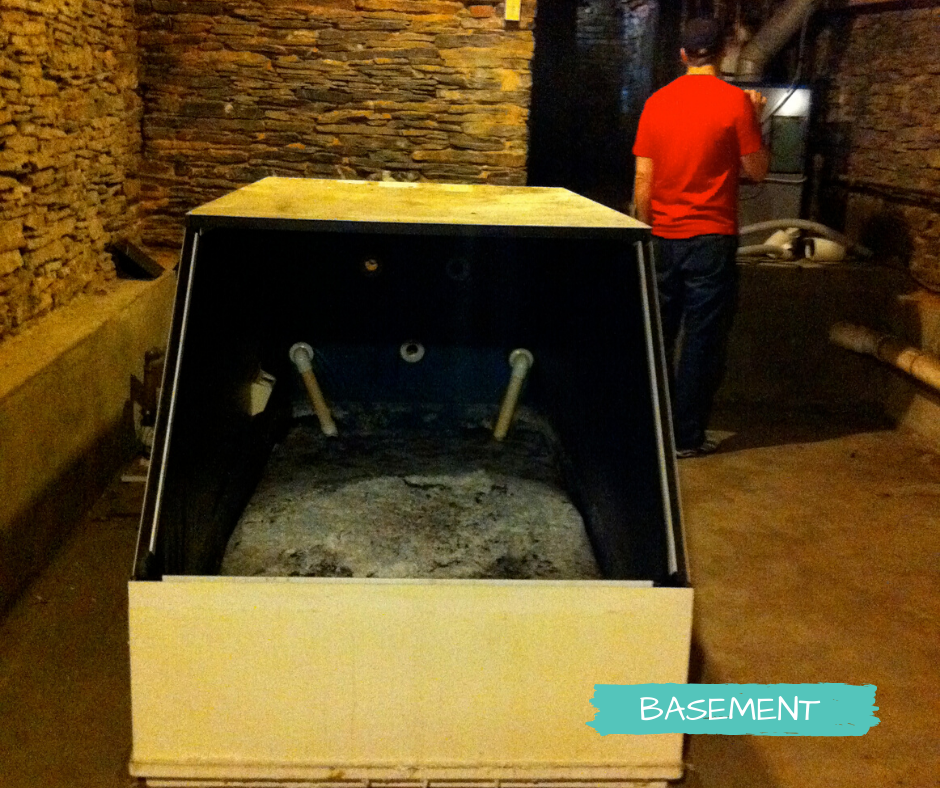
Here’s a little peek inside the money pit. Most people would have shut the door as quickly as they had opened it on this place. To me, it was a diamond in the rough, and I could see its sparkle and brilliance, even in this state.
I cannot wait to share the before and afters for each of these rooms.
But for now, enjoy this walk down memory lane with me.
If you are wondering, that is a sensory deprivation tank.
As I mentioned, I am republishing this blog. It has been nine years and some of these rooms have been redone more than once. I’m sure a few will undergo a few more updates in the next few years.
As many of you know, Jeffrey and I recently closed on what we are affectionately calling “the money pit!” We couldn’t be more excited to start this journey together. I am starting this little blog to record our progress. Jason Swafford, owner of New Vintage Construction, will begin work on the major renovations next week.
Here’s a little background on how we got ourselves into this wonderful mess:
Last summer we decided that we had outgrown our little apartment on 5th street…not only because of our stuff but also because of our growing waistlines! We looked at too many “charming” apartments in downtown Frederick and quickly realized that we could have a mortgage payment for less than a one-bedroom apartment off Market Street.
Enter Abby Zanger: the funniest, best dressed, most determined, honest, and just plain damn amazing realtor on Earth. Abby tirelessly took us to house after house and patiently listened to my unrealistic demands. In July, we stumbled upon a powder blue townhouse in the historic district. I really fell in love the minute we walked into the filthy living room. Room by room, it got worse and worse, but I was falling hard. Envisioning chandeliers, fussy wallpaper that my friends would secretly envy, dinner parties, stainless appliances, and the all-important double sinks…I saw our future home. Undeterred by the hole in the roof, damaged walls, and even the sensory deprivation in the basement… I saw the potential. Unfortunately, it was just out of our budget after we factored in renovation costs.
Months went by. We saw more and more houses, but we were constantly thinking about that crazy blue house. In late December, the house was relisted as a bank-owned property and was now in our price range. We were ready to put in an offer and while on vacation in St. Thomas, we did. Only to get a call before our snorkeling tour telling us that the bank had just accepted another offer before we got ours in. Needless to say, I handled this news in a less than graceful manner and may have scarred the little girl on the bench next to me for life. I did recover and went on the snorkeling tour…
Dejected, we gave up. That’s until Abbey called one day to let us know that the house was back on the market. This was fate… it had it be. We put in our offer and got it…well, kinda. It seemed like with each passing week, something went wrong and pushed us back. Electrical problems, a flood in the dining room, hazard tape being put up around the only entrance. It wasn’t looking good. We had even gotten down to our last extension before the bank was going to dissolve our contract. Friday, April 29th, 2011 was do or die. I waited at work until 4 pm and knew that since I hadn’t heard from Jeff, it was over.
He came to pick me up to go drown our sorrows and the phone rang…Abby was screaming “Get your ass to Old Town Title. NOW.” Less than an hour later we were homeowners. Scared, nervous, excited homeowners!
In this blog, I’ll attempt to document the work we are doing on Our Little Nest on South. Stay tuned… more pictures to come!


